Image Gallery Guidelines: Difference between revisions
From XMS Wiki
Jump to navigationJump to search
No edit summary |
No edit summary |
||
| (3 intermediate revisions by 2 users not shown) | |||
| Line 1: | Line 1: | ||
Guidelines for the Image Gallery ([[GMS:Image Gallery|GMS]], [[WMS:Image Gallery|WMS]]): | Guidelines for the Image Gallery ([[GMS:Image Gallery|GMS]], [[SMS:Image Gallery|SMS]], [[WMS:Image Gallery|WMS]]): | ||
#All images in the Image Gallery are considered free and in the public domain. | #All images in the Image Gallery are considered free and in the public domain. | ||
| Line 12: | Line 12: | ||
#MOST Important: when you capture the image, save it as a .PNG as this format will not leave compression artifacts like we get with .JPG's. | #MOST Important: when you capture the image, save it as a .PNG as this format will not leave compression artifacts like we get with .JPG's. | ||
#"Photoshopping" images is not allowed. | #"Photoshopping" images is not allowed. | ||
[[Category:General Information|I]] | |||
[[Category:Images]] | |||
Latest revision as of 15:49, 29 December 2016
Guidelines for the Image Gallery (GMS, SMS, WMS):
- All images in the Image Gallery are considered free and in the public domain.
- If using Windows 7, change the Theme to "Windows 7 Basic". On Vista, change the theme to "Windows Vista". This gives us a nice blue skin without shadows or transparencies.
- Change the screen resolution to 1440 x 900 to optimize screen icons and image resolution.
- Make your desktop background color white.
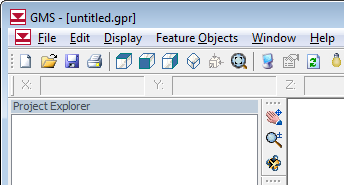
- Fill the entire screen with the application window - but don't "maximize" the screen as this changes the skin slightly. This will give us nice rounded corners at the top left and right of the image.
- Include the entire model in the graphics window.
- Ideally we would like images captured with both white and black background colors in the display properties. White lets us use the image alone. Black looks great if we're showing the entire screenshot with the window borders.
- Expand as many items as you can to fill the Project Explorer window.
- MOST Important: when you capture the image, save it as a .PNG as this format will not leave compression artifacts like we get with .JPG's.
- "Photoshopping" images is not allowed.
