KMZ files: Difference between revisions
No edit summary |
|||
| (4 intermediate revisions by the same user not shown) | |||
| Line 1: | Line 1: | ||
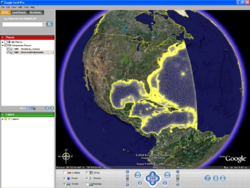
[[Image:GoogleEarth.png|thumb|250px|A 2D Mesh inside Google Earth]] | [[Image:GoogleEarth.png|thumb|250px|A 2D Mesh inside Google Earth]] | ||
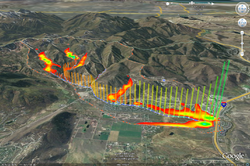
[[File:GoogleEarthKmzAnimExport.png|thumb|250px|Mesh inside Google Earth]] | |||
XMS software can export KMZ files. [http://code.google.com/apis/kml/documentation/ KMZ] files can be imported into [http://earth.google.com/ Google Earth]. | XMS software can export KMZ files. [http://code.google.com/apis/kml/documentation/ KMZ] files can be imported into [http://earth.google.com/ Google Earth]. | ||
| Line 7: | Line 8: | ||
==Raster vs. Vector== | ==Raster vs. Vector== | ||
The KMZ file format supports both vector data (lines, points, polygons, triangles etc.) and raster data (images). When exporting raster data, the image shown in the XMS main graphics window is saved as a PNG image file with georeferencing data. The data is clipped to match the window bounds of the current view. When exporting vector data, all data displayed, as specified by the display options and project explorer, is exported to a vector KMZ file. The following versions of XMS software support vector export: | The KMZ file format supports both vector data (lines, points, polygons, triangles etc.) and raster data (images). When exporting raster data, the image shown in the XMS main graphics window is saved as a PNG image file with georeferencing data. The data is clipped to match the window bounds of the current view. When exporting vector data, all data displayed, as specified by the display options and project explorer, is exported to a vector KMZ file. The following versions of XMS software support vector export: | ||
* GMS – 7.1 | * GMS – 7.1 and above | ||
* SMS – 10.1 | * SMS – 10.1 and above | ||
* WMS – 8.1 | * WMS – 8.1 and above | ||
== How To Export – Screen Capture == | == How To Export – Screen Capture == | ||
| Line 15: | Line 16: | ||
* Export a KMZ file by using the standard ''File'' | '''Save As''' dialog and selecting either the ''Google Earth© Raster KMZ File (*.kmz)'' or ''Google Earth© Vector KMZ File (*.kmz)'' option in the ''Save as type'' field. | * Export a KMZ file by using the standard ''File'' | '''Save As''' dialog and selecting either the ''Google Earth© Raster KMZ File (*.kmz)'' or ''Google Earth© Vector KMZ File (*.kmz)'' option in the ''Save as type'' field. | ||
* To specify a resolution higher than the screen resolution: | * To specify a resolution higher than the screen resolution: | ||
** GMS – Select the '''Options''' button in the ''Save As'' dialog. | |||
* GMS – Select the '''Options''' button in the ''Save As'' dialog. | ** SMS – Change the copy to clipboard scale factor in the [[SMS:Preferences|''Preferences'' dialog]] | ||
* SMS – Change the copy to clipboard scale factor in the [[SMS:Preferences|Preferences dialog]] | |||
The background color is made transparent in the exported KMZ file so the Earth can be seen through the overlayed image in Google Earth©. | The background color is made transparent in the exported KMZ file so the Earth can be seen through the overlayed image in Google Earth©. | ||
== How To Export – Transient Data Animation == | == How To Export – Transient Data Animation == | ||
Export a KMZ transient data animation using the [[SMS:Animations|''Film Loop Wizard'']]. This will export a series of raster images which can be animated in Google Earth©. The background color can be specified in the [[SMS:Animations|Film Loop Wizard]]. It is recommended that the option for no background be used so the Earth can be seen through the overlayed image in Google Earth©. The project must be in plan view to export a KMZ transient data animation. | Export a KMZ transient data animation using the [[SMS:Animations|''Film Loop Wizard'']]. This will export a series of raster images which can be animated in Google Earth©. The background color can be specified in the [[SMS:Animations|''Film Loop Wizard'']]. It is recommended that the option for no background be used so the Earth can be seen through the overlayed image in Google Earth©. The project must be in plan view to export a KMZ transient data animation. | ||
By default, [http://en.wikipedia.org/wiki/Coordinated_Universal_Time Coordinated Universal Time (UTC)] is assumed when exporting KMZ files. An offset from UTC can be specified. A list of time zone offsets from UTC is given [http://en.wikipedia.org/wiki/Timezones here]. | By default, [http://en.wikipedia.org/wiki/Coordinated_Universal_Time Coordinated Universal Time (UTC)] is assumed when exporting KMZ files. An offset from UTC can be specified. A list of time zone offsets from UTC is given [http://en.wikipedia.org/wiki/Timezones here]. | ||
| Line 44: | Line 43: | ||
[[Category:General Information]] | [[Category:General Information]] | ||
[[Category:File Format|K]] | [[Category:File Format|K]] | ||
[[Category:Exporting Data|kmz]] | |||
[[Category:External Links]] | [[Category:External Links]] | ||
Latest revision as of 14:46, 25 May 2018
XMS software can export KMZ files. KMZ files can be imported into Google Earth.
KMZ files can be imported into GMS, SMS, and WMS.
Raster vs. Vector
The KMZ file format supports both vector data (lines, points, polygons, triangles etc.) and raster data (images). When exporting raster data, the image shown in the XMS main graphics window is saved as a PNG image file with georeferencing data. The data is clipped to match the window bounds of the current view. When exporting vector data, all data displayed, as specified by the display options and project explorer, is exported to a vector KMZ file. The following versions of XMS software support vector export:
- GMS – 7.1 and above
- SMS – 10.1 and above
- WMS – 8.1 and above
How To Export – Screen Capture
- The project must be in plan view before exporting a KMZ file.
- Export a KMZ file by using the standard File | Save As dialog and selecting either the Google Earth© Raster KMZ File (*.kmz) or Google Earth© Vector KMZ File (*.kmz) option in the Save as type field.
- To specify a resolution higher than the screen resolution:
- GMS – Select the Options button in the Save As dialog.
- SMS – Change the copy to clipboard scale factor in the Preferences dialog
The background color is made transparent in the exported KMZ file so the Earth can be seen through the overlayed image in Google Earth©.
How To Export – Transient Data Animation
Export a KMZ transient data animation using the Film Loop Wizard. This will export a series of raster images which can be animated in Google Earth©. The background color can be specified in the Film Loop Wizard. It is recommended that the option for no background be used so the Earth can be seen through the overlayed image in Google Earth©. The project must be in plan view to export a KMZ transient data animation.
By default, Coordinated Universal Time (UTC) is assumed when exporting KMZ files. An offset from UTC can be specified. A list of time zone offsets from UTC is given here.
See "Viewing a Timeline" on page 90 of the Google Earth© user Guide or here for an explanation of how to change the time zone used by Google Earth©.
Coordinate System
KMZ files contain latitude and longitude information to define the location of the image. If the current coordinate system type is a projection, like UTM for example, and not a geographic system (which uses latitude and longitude), XMS will attempt to determine the latitude and longitude using coordinate conversion. It's possible that the coordinate conversion may fail, or that the distortion from converting from the current coordinate system to a geographic system is too high. In either case, XMS will issue a warning.
Transparency
The background color is made transparent in the exported PNG image which is in the KMZ file. This makes it so the Earth can be seen through the overlayed image.

