Import from Web: Difference between revisions
From XMS Wiki
Jump to navigationJump to search
No edit summary |
No edit summary |
||
| Line 1: | Line 1: | ||
The | The Import from Web feature allows you to connect to the internet to download free data - images, elevation data etc. If you have an internet connection, this is an easy and convenient way to acquire this type of data. | ||
The data is made available for free by various entities who provide [http://en.wikipedia.org/wiki/Web_service web services]. Each XMS programs has a number of available data types they can retrieve. | The data is made available for free by various entities who provide [http://en.wikipedia.org/wiki/Web_service web services]. Each XMS programs has a number of available data types they can retrieve. | ||
| Line 30: | Line 30: | ||
|} | |} | ||
This feature is found via the ''File|Import from Web'' command. This command results in the following series of dialogs. | This feature is found via the '''''File|Import from Web''''' command. This command results in the following series of dialogs. | ||
<!-- I specify an 80% scaling on all the dialog images. I think the dialogs look way to big otherwise. Unfortunately there's no easy way to do that in MediaWiki so I have to just calculate what 80% of the width is in pixels. --> | <!-- I specify an 80% scaling on all the dialog images. I think the dialogs look way to big otherwise. Unfortunately there's no easy way to do that in MediaWiki so I have to just calculate what 80% of the width is in pixels. --> | ||
#'''Warning''' | #'''Warning''' | ||
#:If your current coordinate system is | #:If your current coordinate system is "Local", you will get the following warning dialog. The data that will be downloaded is georeferenced so your project coordinate system must be something other than 'Local'. Selecting '''OK''' will change the current coordinate system. | ||
#:[[Image:ImportFromWeb-CurrentCoordSystemWarning.png|center|400px|''Warning about Local Coordinate Systems'']] | #:[[Image:ImportFromWeb-CurrentCoordSystemWarning.png|center|400px|''Warning about Local Coordinate Systems'']] | ||
#'''Virtual Earth Map Locator''' | #'''Virtual Earth Map Locator''' | ||
Revision as of 17:12, 18 May 2012
The Import from Web feature allows you to connect to the internet to download free data - images, elevation data etc. If you have an internet connection, this is an easy and convenient way to acquire this type of data. The data is made available for free by various entities who provide web services. Each XMS programs has a number of available data types they can retrieve.
| GMS | SMS | WMS |
This feature is found via the File|Import from Web command. This command results in the following series of dialogs.
- Warning
- If your current coordinate system is "Local", you will get the following warning dialog. The data that will be downloaded is georeferenced so your project coordinate system must be something other than 'Local'. Selecting OK will change the current coordinate system.
- Virtual Earth Map Locator
- Use the map in this dialog to go to your location of interest.
- You can zoom in or out using the controls or the mouse wheel.
- You can pan using the controls or by clicking and dragging. You can also enter the latitude and longitude to jump to a specific location.
- Use the Map Options menu to turn on the floating controls in the map (search, pan and zoom).
- Use the Map Style menu, or the floating controls, to change the map between Road, Aerial, and Hybrid.
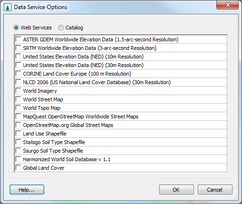
- Data Service Options
- Here you select which type of data you are interested in.
- Save
- Now you are asked where you want to save the data. You only need to specify one file name, even if you've selected more than one type of data in the previous dialog. The files will all be given the same prefix but different suffixes.
- Confirm File Creation
- You may be asked to confirm that you want to create the files.
- Initialize Connection
- The following dialog is shown while the connection is being made.
- Select Scale
- Smaller numbers (larger scales) will result in better resolution, but longer download times.
- Downloading
- This dialog reports the download progress. If you click Abort, your image will exist but will be only that portion that you've downloaded so far.


Steps 6-8 will repeat for each data type you selected in step 4. After everything is finished, the data (images etc.) will appear in the Project Explorer.