GMS:Borehole Tool Palette: Difference between revisions
From XMS Wiki
Jump to navigationJump to search
No edit summary |
No edit summary |
||
| Line 12: | Line 12: | ||
The '''Select Contact''' tool is used to select the interfaces between soil layers. Selected contacts can be deleted as long as there are at least two contacts remaining on the borehole after deletion. In plan view, the selected contact can be dragged anywhere in the XY plane with the mouse. In other views, the selected contact can only be dragged up and down along the Z axis, unless the ''Control'' key is held down, in which case the contact can be dragged anywhere in the viewing plane. The coordinates of the contact can be edited in the [[GMS:The GMS Window|''Edit Window'']]. Multiple contacts can be selected sequentially by holding down the ''Shift'' key, or they can be selected automatically using the [[GMS:Creating and Editing Boreholes#Auto Select|'''Auto Select''']] command. Selected contacts can be used to create TINs. A horizon id can be assigned to a selected contact(s) by selecting the '''Properties''' command in the ''Edit'' menu. | The '''Select Contact''' tool is used to select the interfaces between soil layers. Selected contacts can be deleted as long as there are at least two contacts remaining on the borehole after deletion. In plan view, the selected contact can be dragged anywhere in the XY plane with the mouse. In other views, the selected contact can only be dragged up and down along the Z axis, unless the ''Control'' key is held down, in which case the contact can be dragged anywhere in the viewing plane. The coordinates of the contact can be edited in the [[GMS:The GMS Window|''Edit Window'']]. Multiple contacts can be selected sequentially by holding down the ''Shift'' key, or they can be selected automatically using the [[GMS:Creating and Editing Boreholes#Auto Select|'''Auto Select''']] command. Selected contacts can be used to create TINs. A horizon id can be assigned to a selected contact(s) by selecting the '''Properties''' command in the ''Edit'' menu. | ||
|- | |- | ||
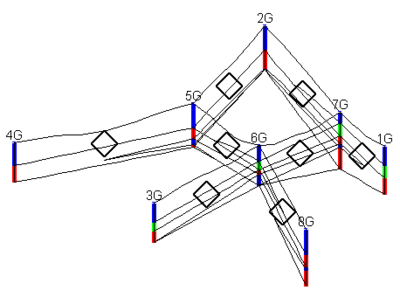
| align = "center" | [[ | | align = "center" | [[File:Select Cross Section Tool.svg|16 px]] || '''Select Cross Section''' || The '''Select Cross Section''' tool selects existing cross sections by clicking on the selection icon in the GMS graphics window when this tool is active. See the figure below. | ||
|- | |- | ||
| align = "center" | [[File:Create Borehole Tool.svg|6 px]] || '''Create Borehole'''|| The '''Create Borehole''' tool can be used to create a new borehole at the location clicked on by the mouse. First a prompt asks for the missing coordinate (i.e., in plan view, the z coordinate is asked for). Boreholes can not be created in oblique view. The borehole is given a default name of "New Borehole" and three segments which are ten units long by default. A newly created borehole can be edited using the other tools in the Tool Palette or the [[GMS:Boreholes|''Borehole Editor'']]. | | align = "center" | [[File:Create Borehole Tool.svg|6 px]] || '''Create Borehole'''|| The '''Create Borehole''' tool can be used to create a new borehole at the location clicked on by the mouse. First a prompt asks for the missing coordinate (i.e., in plan view, the z coordinate is asked for). Boreholes can not be created in oblique view. The borehole is given a default name of "New Borehole" and three segments which are ten units long by default. A newly created borehole can be edited using the other tools in the Tool Palette or the [[GMS:Boreholes|''Borehole Editor'']]. | ||

