SMS:SRH-2D Structures
SRH-2D has the capability to model hydraulic structures including: bridges, culverts, gates, and weirs.
The structure boundary conditions were added to the SRH-2D model at the request of FHWA in 2015 and included in the interface for SMS 12.0. General structure requirements include:
- Each structure is specified by selecting two arcs which represent the upstream and downstream faces of the structure.
- The two arcs must be ordered in the same direction (i.e. left to right as looking downstream). If this is not the case, model results are will not represent the structure.
- In the region of structures that represent one dimensional flow (Weir, Culvert, Gate) the two dimensional flow is disabled. SRH-2D will identify cells/elements enclosed by the upstream and downstream structure definitions (connecting the end points of the arcs/nodestrings) and disable the elements. In order to make the display in SMS match what the model is doing, the user will generally create this polygon in the material coverage and assign the area to the disabled material type.
- 1D hydraulic structures (e.g. culverts and 1D weir over topping) and bridge pressure flow internal boundary conditions will not currently work with models using sediment transport options.
Culvert
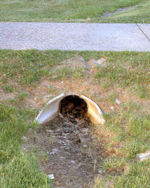
A structure that allows water to flow under a road, railroad, trail, or similar obstruction.
Culverts are generally represented in SRH-2D models as 1D structures. The HY-8 culvert hydraulic analysis program is used to compute the solution for 1D culverts in SRH-2D. Since the actual HY-8 computational engine is coupled with SRH-2D, any culvert that can be represented in HY-8 can be modeled in conjunction with SRH-2D. Multiple culverts can be defined for a project, but all must be defined in the same HY-8 file.
As with all 1D structures represented in an SRH-2D model, the structure is defined in the Boundary Conditions coverage using two arcs. When creating arcs, be sure to draw the arcs in the same direction. These arcs should be placed at the approximate location where the culvert flow will exit the 2D mesh to flow into the culvert and the location where the 1D culvert flow returns to the 2D mesh. Using the widest distance between the culvert wing walls as the arc length is a reasonable estimate in most cases. Care must also be taken to be sure the elevation of the element edges corresponding to the culvert boundary arcs are at an elevation corresponding to the culvert invert elevations. If the 2D mesh elevations at the boundary are too high it can impede flow into the culvert or cause instabilities. Finally, it is recommended that the mesh in the area between the culvert boundary condition arcs be constructed using near orthogonal quadrilateral elements if possible. This helps better define how elements between the arcs are disabled and results in better computational stability.
Specific guidelines include:
- It is necessary to specify a file (path and name) where all HY-8 crossing definitions used in this boundary condition coverage are stored. This is accessed by right-clicking on the coverage and selecting HY-8 Options.
- It is necessary to define the crossing before running SRH-2D. This is done by creating two arcs representing the upstream and downstream portion of the culvert then assigning the both arcs the "Culvert HY-8" Type in the Linear BC dialog. The crossing definition can be accessed in the boundary condition dialog after assigning the arcs to be a culvert.
- HY-8 computes flow both through the culvert and over the road/weir above the culvert. Attributes are specified in the crossing definition.
The boundary conditions options for culvert arcs include:
- Object Role – Allows assigning each arc to be either "culvert upstream" or "culvert downstream".
- Units for HY-8 Display
- Launch HY-8 – Starts the HY-8 software and opens the culvert file that was specified in the coverage Options dialog.
Culvert Coefficients
Culvert coefficients can be found by expanding the table below.
| Entrance Type | Culvert inlet coeff. option | m(in) | Kp | M | Cp | Y |
|---|---|---|---|---|---|---|
| mitered | Concrete – Circular – Headwall; square edge | 0.7 | 0.3153 | 2 | 1.2804 | 0.67 |
| mitered | Concrete – Circular – Headwall; grooved edge | 0.7 | 0.2509 | 2 | 0.9394 | 0.74 |
| mitered | Concrete – Circular – Projecting; grooved edge | 0.7 | 0.1448 | 2 | 1.0198 | 0.69 |
| mitered | Cor metal – Circular – Headwall | 0.7 | 0.2509 | 2 | 1.2192 | 0.69 |
| mitered | Cor metal – Circular – Mitered to slope | 0.7 | 0.2112 | 1.33 | 1.4895 | 0.75 |
| mitered | Cor metal – Circular – Projecting | 0.7 | 0.4593 | 1.5 | 1.779 | 0.54 |
| mitered | Concrete – Circular – Beveled ring; 45 deg bevels | 0.7 | 0.1379 | 2.5 | 0.9651 | 0.74 |
| mitered | Concrete – Circular – Beveled ring; 33.75 deg bevels | 0.7 | 0.1379 | 2.5 | 0.7817 | 0.83 |
| mitered | Concrete – Rectangular – Wingwalls; 30–75 deg flares; square edge | 0.7 | 0.1475 | 1 | 1.2385 | 0.81 |
| Concrete – Rectangular – Wingwalls; 90 and 15 deg flares; square edge | 0.2242 | 0.75 | 1.2868 | 0.8 | ||
| Concrete – Rectangular – Wingwalls; 0 deg flares; square edge | 0.2242 | 0.75 | 1.3608 | 0.82 | ||
| Concrete – Rectangular – Wingwalls; 45 deg flares; beveled edge | 1.623 | 0.667 | 0.9941 | 0.8 | ||
| Concrete – Rectangular – Wingwalls; 18–33.7 deg flare; beveled edge | 1.5466 | 0.667 | 0.801 | 0.83 | ||
| Concrete – Rectangular – Headwall; 3/4 in chamfers | 1.6389 | 0.667 | 1.2064 | 0.79 | ||
| Concrete – Rectangular – Headwall; 45 deg bevels | 1.5752 | 0.667 | 1.0101 | 0.82 | ||
| Concrete – Rectangular – Headwall; 33.7 deg bevels | 1.5466 | 0.667 | 0.8107 | 0.865 | ||
| Concrete – Rectangular – Headwall; 45 deg skew; 3/4 in chamfers | 1.6611 | 0.667 | 1.2932 | 0.73 | ||
| Concrete – Rectangular – Headwall; 30 deg skew; 3/4 in chamfers | 1.6961 | 0.667 | 1.3672 | 0.705 | ||
| Concrete – Rectangular – Headwall; 15 deg skew; 3/4 in chamfers | 1.7343 | 0.667 | 1.4493 | 0.68 | ||
| Concrete – Rectangular – Headwall; 10–45 deg skew; 45 deg bevels | 1.5848 | 0.667 | 1.052 | 0.75 | ||
| Concrete – Rectangular – Wingwalls; non-offset 45 deg flares; 3/4 in chamfers | 1.5816 | 0.667 | 1.0906 | 0.803 | ||
| Concrete – Rectangular – Wingwalls; non-offset 18.4 deg flares; 3/4 in chamfers | 1.5689 | 0.667 | 1.1613 | 0.806 | ||
| Concrete – Rectangular – Wingwalls; non-offset 18.4 deg flares; 30 deg skewed barrel | 1.5752 | 0.667 | 1.2418 | 0.71 | ||
| Concrete – Rectangular – Wingwalls; offset 45 deg flares; beveled top edge | 1.5816 | 0.667 | 0.9715 | 0.835 | ||
| Concrete – Rectangular – Wingwalls; offset 33.7 deg flares; beveled top edge | 1.5752 | 0.667 | 0.8107 | 0.881 | ||
| Concrete – Rectangular – Wingwalls; offset 18.4 deg flares; beveled top edge | 1.5689 | 0.667 | 0.7303 | 0.887 | ||
| Cor metal – Rectangular – Headwall | 0.267 | 2 | 1.2192 | 0.69 | ||
| Cor metal – Rectangular – Projecting; thick wall | 0.3023 | 1.75 | 1.3479 | 0.64 | ||
| Cor metal – Rectangular – Projecting; thin wall | 0.4593 | 1.5 | 1.5956 | 0.57 | ||
| Concrete – Horizontal ellipse – Headwall; square edge | 0.3217 | 2 | 1.2804 | 0.67 | ||
| Concrete – Horizontal ellipse – Headwall; grooved edge | 0.1379 | 2.5 | 0.9394 | 0.74 | ||
| Concrete – Horizontal ellipse – Projecting; grooved edge | 0.1448 | 2 | 1.0198 | 0.69 | ||
| Cor metal – Pipe arch (18in corner) – Headwall | 0.267 | 2 | 1.5956 | 0.57 | ||
| Cor metal – Pipe arch (18in corner) – Mitered to slope | 0.1702 | 1 | 1.4895 | 0.75 | ||
| Cor metal – Pipe arch (18in corner) – Projecting | 0.4593 | 1.5 | 1.5956 | 0.53 | ||
| Structural plate – Pipe arch (18in corner) – Projecting | 0.3998 | 1.5 | 1.5667 | 0.55 | ||
| Structural plate – Pipe arch (18in corner) – Headwall; square edge | 0.2799 | 2 | 1.1613 | 0.66 | ||
| Structural plate – Pipe arch (18in corner) – Headwall; beveled edge | 0.0965 | 2 | 0.8493 | 0.75 | ||
| Structural plate – Pipe arch (31in corner) – Projecting | 0.3998 | 1.5 | 1.5667 | 0.55 | ||
| Structural plate – Pipe arch (31in corner) – Headwall; square edge | 0.2799 | 2 | 1.1613 | 0.66 | ||
| Structural plate – Pipe arch (31in corner) – Headwall; beveled edge | 0.0965 | 2 | 0.8493 | 0.75 | ||
| Cor metal – Arch – Headwall | 0.267 | 2 | 1.2192 | 0.69 | ||
| Cor metal – Arch – Mitered to slope | 0.9651 | 2 | 1.4895 | 0.75 | ||
| Cor metal – Arch – Projecting | 0.4593 | 1.5 | 1.5956 | 0.57 | ||
| Concrete – Circular – Tapered throat | 1.3991 | 0.555 | 0.6305 | 0.89 | ||
| Cor metal – Circular – Tapered throat | 1.576 | 0.64 | 0.9297 | 0.9 | ||
| Concrete – Rectangular – Tapered throat | 1.5116 | 0.667 | 0.5758 | 0.97 |
2D Culverts as Bridge Structures
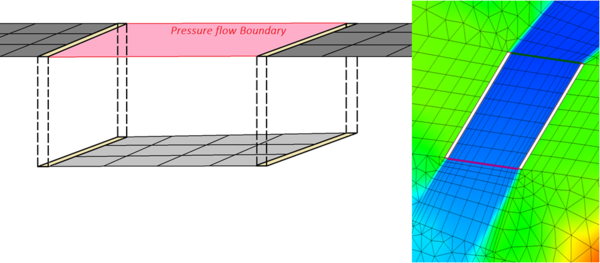
Culverts can also be represented in an SRH-2D model using a 2D approach. This is done by including the base of the culvert in the 2D mesh and mapping the culvert invert elevations. The top of the culvert is represented as a pressure flow bridge. The side walls are represented as either very steep side slopes, or by creating a hole in the mesh that specifies vertical walls. Holes in the mesh can create problems if overtopping occurs and the flow is not in line with the culvert, as the holes create infinitely high vertical walls and can impede transverse overtopping flow.
Culvert without HY-8
SRH-2D also supports a generic culvert. In general, this option is similar to the HY-8 culvert option, but the culvert attributes are assigned in the dialog rather than being assigned and computed using HY-8. The generic culvert option has fewer options for types and attributes for culverts, therefore it is usually recommended to use the HY-8 culvert option.
When creating a culvert structure:
- Create two arcs on the SRH-2D boundary conditions coverage.
- Select both arcs and open the SRH-2D Linear BC dialog.
- Set the Type to "Culvert".
Culvert structure can be assigned the following boundary condition options:
- Object Role – Allows assigning each arc to be either "culvert upstream" or "culvert downstream".
- Upstream invert elevation (ZI)
- Interior height of barrel (Dc)
- Length of barrel (Lc)
- Area of barrel (Ac)
- Hydraulic radius of barrel (Rh) – This should be the hydraulic radius of the culvert at full flow.
- Slope of barrel (Slp)
- Units – Can be set to feet or meters.
- Number of identical barrels
- Entrance type (m_in)
- Culvert inlet coefficients (Kp, M, cp, Y)
- Entrance loss coeff. (Ke)
- Manning roughness coefficient in barrel (Nc)
- Use total head (velocity and water surface)
- Crest Elevation
- Length of Weir over Culvert
- Type – Allows assigning "paved", "gravel", "single", "double", "sharp", "broad", or "user" defined.
Gate
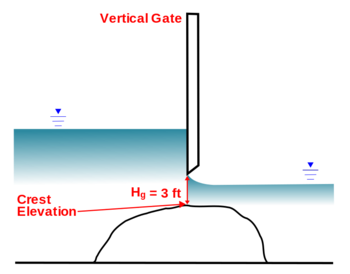
Gate structures can simulate both overflow and underflow gates. Adding a gate structure to the boundary conditions coverage requires creating two arcs and assigning both the arcs the "Gate" Type in the Linear BC dialog.
The boundary conditions options for gate arcs include:
- Object Role – Allows assigning each arc to be either "gate upstream" or "gate downstream".
- Units – Can be set to feet or meters.
- Crest Elevation – Represents the elevation of the base upon which the gate closes, or channel bottom.
- Height of Gate Opening – Represents the opening measured vertically from the base of the structure to the top of the gate opening.
- Width of Gate Opening – Represents the horizontal width of the gate opening.
- Contract Coefficient with Underflow Orifice – Used to calculate the discharge coefficient, which is then used to determine the flow under the gate.
- Type – Allows assigning "paved", "gravel", "single", "double", "sharp", "broad", or "user" defined.
Pressure Flow Bridge
A bridge can be represented as a pressure flow boundary condition in SMS.
- The pressure zone definition defines a ceiling elevation that can vary linearly from the upstream arc to the downstream arc. This could also be side to side if the arcs are defined as the sides of the bridge instead of upstream/downstream. More complex ceiling elevation variation can be simulated using multiple pairs of pressure flow arcs or by specifying "Parabolic" as the Ceiling Type.
- The pressure zone cannot touch any mesh/grid boundaries.
- Piers within the pressure zone can be represented with holes in the mesh or with obstructions.
- Overtopping can be turned on or off.
The boundary conditions options for pressure flow arcs include:
- Object Role – Allows assigning each arc to be either "pressure upstream" or "pressure downstream".
- Ceiling Type – Can select flat or parabolic.
- Units – Can select feet or meters.
- Ceiling elevation along upstream
- Ceiling elevation along downstream
- Manning roughness coefficient between water and ceiling
- Model Overtopping on this zone – Check/uncheck box to turn on/off overtopping computations.
If the overtopping box is checked, additional options are included:
- Crest elevation
- Length of weir over pressure zone – Lateral length of weir over the pressure zone.
- Weir Type – Allows assigning the following:
- Paved roadway – Flow over a roadway embankment with a paved surface.
- Gravel roadway – Flow over a roadway embankment with a gravel surface.
- Single railroad track – Flow over a railroad track embankment with one set of rails.
- Double railroad track – Flow over a railroad track embankment with two sets of rails.
- Sharp crested weir – Flow over a sharp crested weir.
- Broad crested weir – Flow over a broad crested weir.
- User defined – Flow over a user defined weir.
Weir
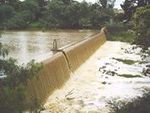
A barrier across a river designed to alter its flow characteristics. In SMS, a weir can be represented as two arcs. One arc represents the upstream face of the weir structure and the other represents the downstream face of the weir.
Typically a weir would be represented in the geometry of the mesh/grid. One application of the weir structure would be to quickly investigate the impact of inserting a weir with a variety of crest elevations (designing the structure). In this case, the same grid/mesh could be used for all simulations.
SRH-2D handles transcritical and supercritical flow well, so flow can be properly computed by having the flow go over an embankment and down the side slope through supercritical flow then back to subcritical flow. The elevations defining the roadway or embankment must be included in the mesh. The mesh elements must be configured to capture the details of the embankment elevations. Usually, this is done by creating arcs representing the toes and shoulders of the embankment then creating a “patch” mesh of at least 2, and preferably 5–6 elements between. This results in rectangular elements parallel to the embankment toes, and creates enough nodes up and down the embankment to capture the elevation details. For embankments with a flat top or roadway, it is recommended that there be at least one full element at the roadway top elevation to capture the roadway surface elevation.
The 2D weir approach discussed in the previous paragraph for roadway embankments can be used for other types of weir structures, as they often are a simple dam and spillway structure. The exception would be a sharp-crested weir that has flow separation as the water goes over the weir. For this type of weir, a 1D weir structure can be used to represent the weir.
As with other 1D structures, the 1D weir structure is defined in the SRH-2D Boundary Condition coverage using two arcs placed at the approximate location where the weir flow will exit the 2D mesh and the location where the weir flow returns to the mesh. The arc length would represent the approximate length of the weir. Be sure to draw the arcs in the same direction. Once the arcs are created, the weir parameters can be set including the crest elevation, lateral length of the weir, and the weir type. Various weir types may be defined including: paved and gravel embankments, single and double crested, sharp and broad crested, as well as user-defined weirs. As with other 1D structures it is recommended that the mesh in the area between the boundary condition arcs be constructed using quadrilateral elements if possible. The figure below illustrates how a sharp crested weir might be represented as a 1D structure in SRH-2D.
The boundary conditions options for weir arcs include:
- Object Role – Allows assigning each arc to be either "gate upstream" or "gate downstream".
- Units – Select "Feet" or "Meters".
- Crest elevation– The lowest elevation in the weir over which water flows.
- Length of weir – Lateral length of the weir.
- Type – Allows assigning the following:
- Paved roadway – Flow over a roadway embankment with a paved surface.
- Gravel roadway – Flow over a roadway embankment with a gravel surface.
- Single railroad track – Flow over a railroad track embankment with one set of rails.
- Double railroad track – Flow over a railroad track embankment with two sets of rails.
- Sharp crested weir – Flow over a sharp crested weir.
- Broad crested weir – Flow over a broad crested weir.
- User – Flow over a user defined weir.
- Cw – dimensionless weir discharge coefficient for free (unsubmerged) weir flow. This value is usually 0.54; but 0.67 may be used for semicircular shaped drop inlet crests.
- a – Dimensionless submergence factor coefficient. Used by SRH-2D to calculate a weir submergence factor (Cs).
- b – Dimensionless submergence factor coefficient. Used by SRH-2D to calculate a weir submergence factor (Cs).
Internal Sink
An internal sink can simulate wells, drains or other points of outflow. It can also simulate a source. It is assigned to a single feature arc on a boundary conditions coverage. Internal Sink Options include:
- Sink Flow (Q) Type
- "Constant" – Use for a steady state simulation.
- Constant Q – Enter a real positive value along with the units as either "cfs" or "cms".
- "Time Series" – Use for unsteady flow.
- Define Series – Clicking the button will bring up the XY Series Editor. Units must be specified as either "hrs-vs-cfs" or "hrs-vs-cms".
- "Weir"
- Coeff (Cw)
- Crest elevation (Zb) – The lowest elevation in the weir over which water flows.
- Length across weir (Lw) – Lateral length of the weir.
- Units – Select "Feet" or "Meters".
- Use total head
- "Rating curve" – Use for unsteady flow.
- Define Curve – Clicking the button will bring up the XY Series Editor for entering the discharge versus elevation rating curve values.
- "Constant" – Use for a steady state simulation.
Link
A link can be used to simulate flow between two parts of a mesh that are not connected. To create a link, select two feature arcs. The arcs can connect otherwise disconnected portions of a mesh. Options for a link include:
- Object Role – Allows assigning each arc to be either "link inflow" or "link outflow".
- Link inflow (Q) type – Can be set to "Constant", "Time Series", "Weir", or "Rating Curve".
- "Constant" – Use for a steady state simulation.
- Constant Q – Enter a real positive value along with the units as either "cfs" or "cms".
- "Time Series" – Use for unsteady flow.
- Define Series – Clicking the button will bring up the XY Series Editor. Units must be specified as either "hrs-vs-cfs" or "hrs-vs-cms".
- "Weir"
- Coeff (Cw)
- Crest elevation (Zb) – The lowest elevation in the weir over which water flows.
- Length across weir (Lw) – Lateral length of the weir.
- Units – Select "Feet" or "Meters".
- Use total head
- "Rating curve" – Use for unsteady flow.
- Define Curve – Clicking the button will bring up the XY Series Editor for entering the discharge versus elevation rating curve values.
- "Constant" – Use for a steady state simulation.
- Link Lag Method – Can be set to "Specified" or "Computed".
- "Specified"
- Specified Lag (Sec)
- "Computed"
- Conduit Length
- Conduit Diameter
- Conduit Slope
- Conduit Mannings N
- Conduit Units – Select "Feet" or "Meters".
- "Specified"
Related Topics
SMS – Surface-water Modeling System | ||
|---|---|---|
| Modules: | 1D Grid • Cartesian Grid • Curvilinear Grid • GIS • Map • Mesh • Particle • Quadtree • Raster • Scatter • UGrid |  |
| General Models: | 3D Structure • FVCOM • Generic • PTM | |
| Coastal Models: | ADCIRC • BOUSS-2D • CGWAVE • CMS-Flow • CMS-Wave • GenCade • STWAVE • WAM | |
| Riverine/Estuarine Models: | AdH • HEC-RAS • HYDRO AS-2D • RMA2 • RMA4 • SRH-2D • TUFLOW • TUFLOW FV | |
| Aquaveo • SMS Tutorials • SMS Workflows | ||


