GMS:Creating and Editing Boreholes
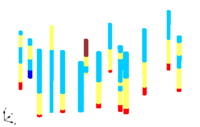
Boreholes can be created by importing borehole data, importing sample data, or using the borehole tools to manually enter the boreholes.
To create a borehole data file, make a file with the borehole name, x, y, z, locations and a material ID. The z location will be the top of the soil layer. Once a borehole has been created and imported, it can be edited in the Borehole Editor or by using the borehole tools.
When right-clicking on a borehole in the Project Explorer, copy the borehole by selecting the Duplicate command in the pop up menu. This will create a new borehole offset in x and y by 10% of the extents of the current data in GMS. This command is useful when there is a large gap between boreholes. A new borehole with similar stratigraphy to neighboring boreholes can be placed in the gap and the contacts can be positioned as desired. Adding an artificial borehole or a "pseudo-borehole" in the gap gives more control over the shape of the TINs and solids created from the boreholes.
Boreholes can be locked to prevent them from being edited. When the boreholes are locked, all graphical editing is disabled and a check appears on the menu. This prevents the boreholes, the borehole contacts, and the borehole segments from being inadvertently dragged with the mouse. Also, the Edit Window becomes disabled. The boreholes can still be edited using the Borehole Editor. The boreholes can be unlocked by selecting the Lock All Boreholes command again, and the check in the menu will disappear.
Auto Select
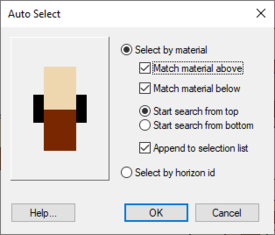
With a large number of boreholes, it may be tedious to individually select all the borehole contacts necessary for an operation. For this reason, the capability to automatically select multiple contacts is provided with the Auto Select Contacts/Segments command. One contact representing a prototype or example is first selected and the Auto Select Contacts/Segments command is chosen. The Auto Select dialog appears showing a close-up of the selected contact and allows for:
- Matching of the material above, below, or both.
- Starting the search from the top or the bottom of the borehole.
Since only one contact per borehole is selected, the appropriate combination of the above options is important. Each borehole is searched from either the top or bottom of the hole until the first match is made. That contact is then added to the set of selected contacts.
The Auto Select Contacts/Segments command can also be used with the Select Segment tool in the Borehole tool palette to quickly select all segments matching a selected borehole segment. In this case, the segments are selected automatically and the Auto Select dialog does not appear.
Borehole Editor
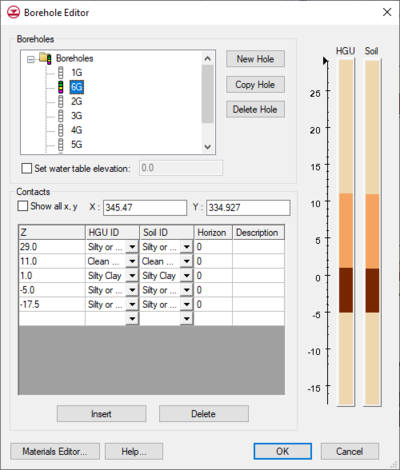
The Borehole Editor can be used to create new boreholes and edit existing boreholes. The existing boreholes are displayed in a tree window at the top of the dialog, with the currently selected borehole being highlighted. The currently selected borehole is drawn along the right side of the dialog. Both Hydrogeologic Units (HGU) and Soils are shown.
The name of the borehole can be changed by clicking on the borehole name in the text window and typing in a new name.
A water table elevation can be entered using Set water table elevation. This can be used to display a water table symbol on each hole.
The borehole's contacts are listed in the spreadsheet in the middle of the dialog. Contacts can be deleted and new contacts can be inserted above the currently selected contact using the buttons just below the spreadsheet. The material below the contact is specified by selecting the material name.
| GMS – Groundwater Modeling System | ||
|---|---|---|
| Modules: | 2D Grid • 2D Mesh • 2D Scatter Point • 3D Grid • 3D Mesh • 3D Scatter Point • Boreholes • GIS • Map • Solid • TINs • UGrids | |
| Models: | FEFLOW • FEMWATER • HydroGeoSphere • MODAEM • MODFLOW • MODPATH • mod-PATH3DU • MT3DMS • MT3D-USGS • PEST • PHT3D • RT3D • SEAM3D • SEAWAT • SEEP2D • T-PROGS • ZONEBUDGET | |
| Aquaveo | ||


