SMS:Holland\PBL: Difference between revisions
No edit summary |
|||
| Line 1: | Line 1: | ||
{{PBL Release}} | {{PBL Release}} | ||
The ADCIRC wind coverage represents a storm, such as a tropical depression or hurricane. This information can be imported from NWS 8 and 19 files (fort.22 and fort.15 files [1]), and exported by SMS for use with ADCIRC. Running ADCIRC directly from SMS also works fine, and various model checks have been implemented to help | The ADCIRC wind coverage represents a storm, such as a tropical depression or hurricane. This information can be imported from NWS 8 and 19 files (fort.22 and fort.15 files [1]), and exported by SMS for use with ADCIRC. Running ADCIRC directly from SMS also works fine, and various model checks have been implemented to help catch mistakes and avoid crossing ADCIRC's limitations. | ||
To create a wind coverage, create a new coverage and select the coverage type ''Models | Wind'' | '''Holland/ PBL'''. Alternately, | To create a wind coverage, create a new coverage and select the coverage type ''Models | Wind'' | '''Holland/ PBL'''. Alternately, convert an existing coverage by right-clicking it and selecting ''Type | Models | Wind ''| '''Holland/ PBL''' | ||
==Coverage Attributes== | ==Coverage Attributes== | ||
| Line 20: | Line 20: | ||
* Operate in Geographic Coordinates | * Operate in Geographic Coordinates | ||
* Make a single path with no breaks | * Make a single path with no breaks | ||
* Create the number of vertices/nodes that there is data for ( | * Create the number of vertices/nodes that there is data for (adjust their positions manually with the nodes/vertices selected, or set their positions within the ''Node Attributes'' dialog) | ||
Don't: | Don't: | ||
| Line 43: | Line 43: | ||
==Linking the Coverage to the ADCIRC Project== | ==Linking the Coverage to the ADCIRC Project== | ||
Once | Once having defined the storm path and all its data, it's time to link the project into ADCIRC. To do this, select the ADCIRC mesh and go to ''ADCIRC'' | '''Model Control'''. | ||
Choose the ''Wind'' tab. Select either Dynamic Holland Model (NWS=8) or Asymmetric vortex, Holland gradient wind model (NWS=19). In the ''Wind File Options'' section, click '''Choose coverage...''' to select the coverage and link it in. The '''Options''' button will now open the ''Coverage Attributes'' dialog | Choose the ''Wind'' tab. Select either Dynamic Holland Model (NWS=8) or Asymmetric vortex, Holland gradient wind model (NWS=19). In the ''Wind File Options'' section, click '''Choose coverage...''' to select the coverage and link it in. The '''Options''' button will now open the ''Coverage Attributes'' dialog where the attributes for the coverage can be edited. | ||
In the ''Timing'' tab be sure to set up the simulation start time and how long it runs. The wind coverage's time span should have the same start time and duration, or be longer so that it encompasses the simulation time span. | In the ''Timing'' tab be sure to set up the simulation start time and how long it runs. The wind coverage's time span should have the same start time and duration, or be longer so that it encompasses the simulation time span. | ||
Also set up any other ADCIRC settings as needed. When finished, click '''OK''', then go to ''File ''| '''Save ADCIRC''', then ''ADCIRC'' | '''Run ADCIRC'''. The model check will alert | Also set up any other ADCIRC settings as needed. When finished, click '''OK''', then go to ''File ''| '''Save ADCIRC''', then ''ADCIRC'' | '''Run ADCIRC'''. The model check will alert of any potential problems before ADCIRC runs. | ||
Revision as of 15:52, 29 April 2016
| The PBL engine is developed and maintained by Oceanweather Inc. Distribution of the model itself is controlled by OWI and is not available for sale through Aquaveo. |
The ADCIRC wind coverage represents a storm, such as a tropical depression or hurricane. This information can be imported from NWS 8 and 19 files (fort.22 and fort.15 files [1]), and exported by SMS for use with ADCIRC. Running ADCIRC directly from SMS also works fine, and various model checks have been implemented to help catch mistakes and avoid crossing ADCIRC's limitations.
To create a wind coverage, create a new coverage and select the coverage type Models | Wind | Holland/ PBL. Alternately, convert an existing coverage by right-clicking it and selecting Type | Models | Wind | Holland/ PBL
Coverage Attributes
To access the coverage attributes, right-click on the coverage and select Properties.... The coverage attributes dialog contains several separate fields that apply to the entire hurricane, such as whether it is symmetric or asymmetric. The storm's symmetry in particular is important to set before editing node properties because it affects which fields are shown by default and regarded as required.
- Wind Model: Choose between symmetric and asymmetric definition of the storm. The wind model will determine which fields are displayed and which are hidden (by default) in the node attributes dialog.
- Symmetric is the basic and default choice, and assumes a simple storm definition will suffice.
- Asymmetric gives a lot more options for defining the storm's shape and orientation.
- PBL (Planetary Boundary Layer) is discussed separately.
- Basin and Subregion: For informational purposes, these define where in the world the storm is taking place.
- Annual cyclone number: Does not affect calculations, but is valuable for book keeping.
Building a Storm Path
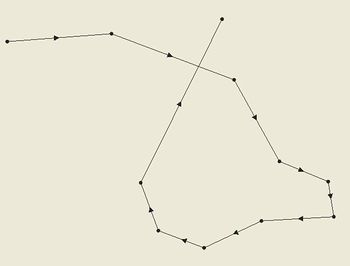
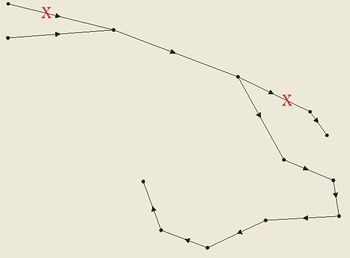
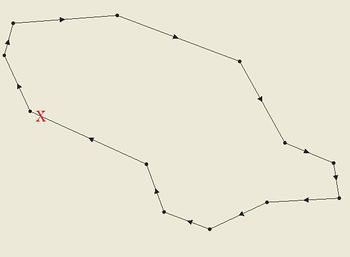
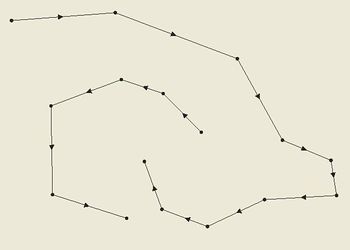
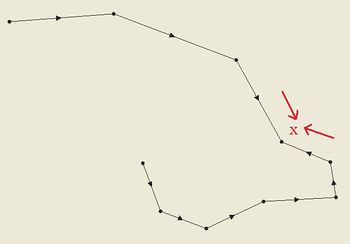
The storm path should be a single continuous line with no breaks or branches. Simply clicking out an arc is sufficient—vertices will be converted to nodes once they have been entered in the Node Attributes dialog.
Do:
- Operate in Geographic Coordinates
- Make a single path with no breaks
- Create the number of vertices/nodes that there is data for (adjust their positions manually with the nodes/vertices selected, or set their positions within the Node Attributes dialog)
Don't:
- Create multiple paths in the same coverage
- Split the path in multiple directions
- Create loops with the path
Notes
Consequently, the storm path and nodes information may be obtained in a hurdat file obtained on the NOAA website. Access website and save the Easy to Read version of the file. Extension for file must be saved as hurdat in order to open in SMS.
Linking the Coverage to the ADCIRC Project
Once having defined the storm path and all its data, it's time to link the project into ADCIRC. To do this, select the ADCIRC mesh and go to ADCIRC | Model Control.
Choose the Wind tab. Select either Dynamic Holland Model (NWS=8) or Asymmetric vortex, Holland gradient wind model (NWS=19). In the Wind File Options section, click Choose coverage... to select the coverage and link it in. The Options button will now open the Coverage Attributes dialog where the attributes for the coverage can be edited.
In the Timing tab be sure to set up the simulation start time and how long it runs. The wind coverage's time span should have the same start time and duration, or be longer so that it encompasses the simulation time span.
Also set up any other ADCIRC settings as needed. When finished, click OK, then go to File | Save ADCIRC, then ADCIRC | Run ADCIRC. The model check will alert of any potential problems before ADCIRC runs.
SMS – Surface-water Modeling System | ||
|---|---|---|
| Modules: | 1D Grid • Cartesian Grid • Curvilinear Grid • GIS • Map • Mesh • Particle • Quadtree • Raster • Scatter • UGrid |  |
| General Models: | 3D Structure • FVCOM • Generic • PTM | |
| Coastal Models: | ADCIRC • BOUSS-2D • CGWAVE • CMS-Flow • CMS-Wave • GenCade • STWAVE • WAM | |
| Riverine/Estuarine Models: | AdH • HEC-RAS • HYDRO AS-2D • RMA2 • RMA4 • SRH-2D • TUFLOW • TUFLOW FV | |
| Aquaveo • SMS Tutorials • SMS Workflows | ||

