SMS:Grid Frame Properties
The Grid Frame Properties dialog is accessed when the Create 1D Grid Frame tool or the Create 2D Grid Frame tool is used. It can also be accessed after a grid frame has been created by using Select 1D Grid Frame tool or the Select 2D Grid Frame tool then right-clicking on the grid and selecting the Properties command from the right-click menu.
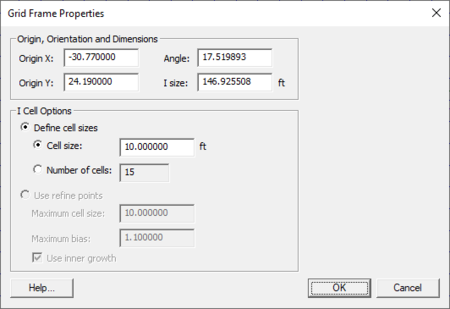
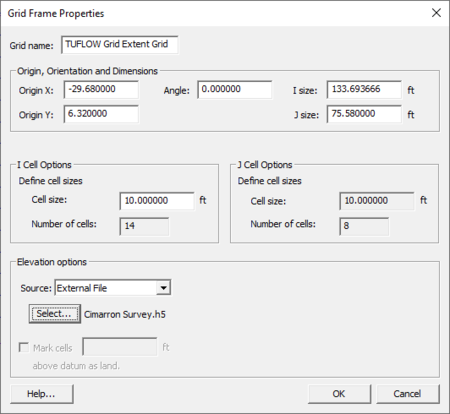
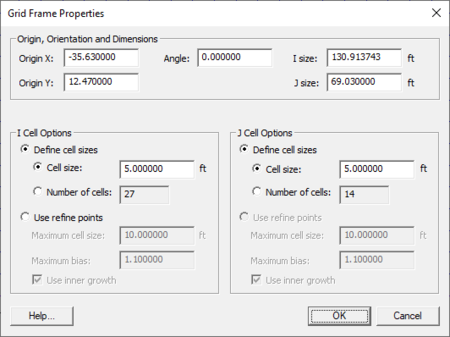
The Grid Frame Properties dialog allows specifying the attributes applied to the grid frame when performing a Map → 2D Grid, Map → 1D Grid, or Map → Quadtree operation. These properties are as follows:
- Origin X/Y – Set the bottom left corner location of the grid frame.
- Orientation
- Angle – Set the angle the grid frame will be rotated counter-clockwise from the +x axis.
- I/J size – Set the length and width of the grid frame. The cell dimensions are updated: Cell X = Grid X / Number of Columns, Cell Y = Grid Y / Number of Rows.
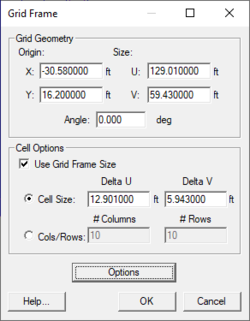
- Cell Options – These options vary based on the grid type being generated. A few of the options are illustrated below. Specify the size of the cells to be created in each of the applicable directions from the following options:
- Cell size (or Base cell size if telescoping is an option) – Set the dimension (width or height) of each cell for the grid to be created.
- Number of cells – Set the number of rows and/or columns for the grid to be created.
- Use refine points – Tell SMS to use specified refine points in a CMS-Flow or CMS-Wave coverage. This will result in rectangular cells with variable aspect ratio.
- Maximum cell size – The max size the should exists when growing
- Maximum bias – The max growth ratio to be used when growing
- Use inner growth – Specifies whether the cell sizes should grow between two refine points
- Grid size – The grid dimension in the specified direction
- Adjust base cell size – This button appears only for CMS-Flow coverages when there are feature polygons with target maximum size guidelines specified. Clicking on this button will update the base cell sizes so that the larger of the two is a multiple of the minimum feature size that is to be represented in the grid. For example, if having specified 20 m as the maximum cell size (to allow for 5 cells to represent a channel that is 100 m across), and the base cell size is 75 m in both directions, this button will increase the base cell size to 80 meters in both directions. Therefore the smallest cell generated will be 20 m by 20 m, whereas, a base cell size of 75 m would result in a cell 18.25 m on each side. The objective is to make the base cell size correspond to the smallest user specified target cell size.
- Options – Set the interpolation options for the Scatter applications. Not used for the Cartesian or 1D Grid applications.
When specifying Define cell sizes, there are a few options available. These options are:
- Specify cell size – Specify the cell size and the number of cells will be computed.
- Specify number of cells – Specify the number of cells and the cell size will be computed.
If the grid is to have square cells, the v direction cell size will always be linked to the u direction cell size.
The Grid Frame Properties dialog varies depending on the active coverage.
They are also created temporarily in a number of functions in the SMS interface including:
- Creating a grid in the Grid Module
- Interpolating from a scatter set to a scatter grid (Scatter | Interp to Scatter Grid in the Scatter module).
- Interpolating from a scatter set to a nautical grid (Scatter | Interp to Nautical Grid in the Scatter module).
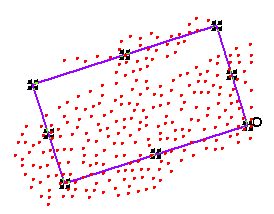
Grid frames consist of a rectangular shape, normally defined by three graphical clicks, which can be oriented and stretched using handles on the sides and corners as shown in the following image to create an arbitrary rectangle shape.
Depending on the application of the grid frame, it will have a variety of attributes or properties.
Interact with the grid frame when the Select Grid Frame tool is active, or define grid frame properties explicitly using the Grid Frame Properties dialog (this dialog is accessible by right-clicking on the grid frame or when converting to a grid.
Interactive Options
Using Select Grid Frame tool, the grid frame can be manipulated directly in the Main Graphics window. The following actions can be taken:
- Move Frame – Click inside or on an edge where the frame is not highlighted and drag.
- Resize Frame – Click a highlighted corner or edge and drag to resize.
- Rotate Frame – Click inside the circle near the bottom right corner of the frame and drag to rotate the frame.
- Refresh
 – Redraw the screen.
 - Frame
 – Zoom to the extents of the data in the screen.
While graphically manipulating the grid frame, the current values of origin, orientation and/or size are displayed at the bottom of the Main Graphics window.
Related Topics
| [hide] SMS – Surface-water Modeling System | ||
|---|---|---|
| Modules: | 1D Grid • Cartesian Grid • Curvilinear Grid • GIS • Map • Mesh • Particle • Quadtree • Raster • Scatter • UGrid |  |
| General Models: | 3D Structure • FVCOM • Generic • PTM | |
| Coastal Models: | ADCIRC • BOUSS-2D • CGWAVE • CMS-Flow • CMS-Wave • GenCade • STWAVE • WAM | |
| Riverine/Estuarine Models: | AdH • HEC-RAS • HYDRO AS-2D • RMA2 • RMA4 • SRH-2D • TUFLOW • TUFLOW FV | |
| Aquaveo • SMS Tutorials • SMS Workflows | ||
