GMS:Raster Catalog: Difference between revisions
From XMS Wiki
Jump to navigationJump to search
No edit summary |
|||
| Line 7: | Line 7: | ||
To create a raster catalog simply select the desired rasters in the Project Explorer, right-click and select the '''New Raster Catalog''' command. | To create a raster catalog simply select the desired rasters in the Project Explorer, right-click and select the '''New Raster Catalog''' command. | ||
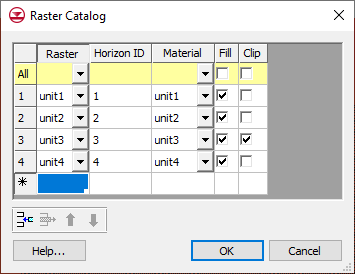
The figure below shows a sample raster catalog. | |||
[[Image:raster_catalog_table.png|thumb|none|380 px|Example raster catalog.]] | [[Image:raster_catalog_table.png|thumb|none|380 px|Example raster catalog.]] | ||
| Line 36: | Line 32: | ||
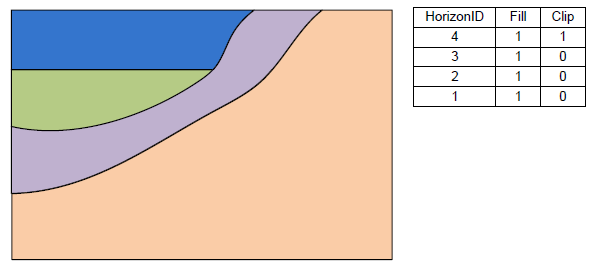
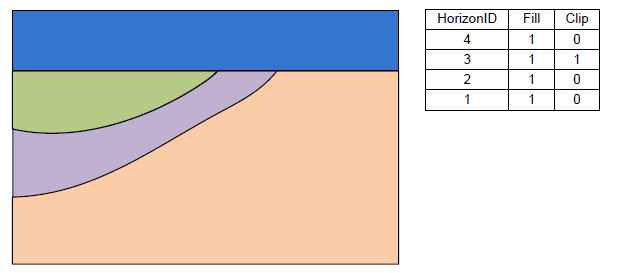
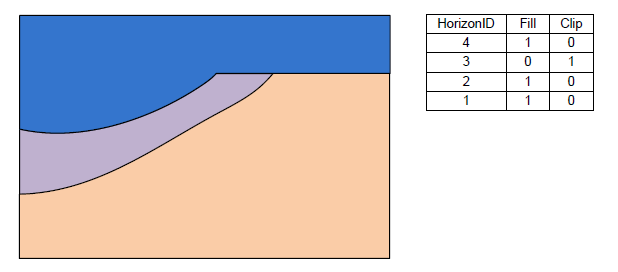
[[Image:raster_catalog5.png |none|frame |Stratigraphy with the Fill-off and Clip-on for horizon 3.]] | [[Image:raster_catalog5.png |none|frame |Stratigraphy with the Fill-off and Clip-on for horizon 3.]] | ||
==Horizons → Solids== | |||
Raster catalogs are used to create solids using the Horizons → Solids method. Each raster represents the top of a horizon. Right-click on the raster catalog and select the '''Horizons→Solids''' command to start the ''Horizons to Solids'' wizard. | |||
==Interpolation== | |||
A raster catalog can be interpolated to other GMS objects (TINs, meshes etc) by right-clicking on the raster catalog and selecting the desired interpolation command. Unlike interpolating from multiple selected rasters, when interpolating from a raster catalog, only one dataset will be created. | |||
