GMS:Raster Catalog: Difference between revisions
From XMS Wiki
Jump to navigationJump to search
| Line 7: | Line 7: | ||
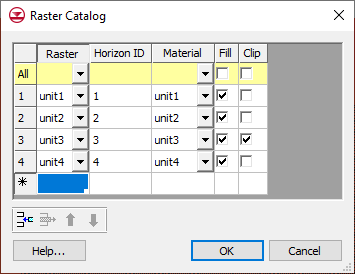
To create a raster catalog simply select the desired rasters in the Project Explorer, right-click and select the '''New Raster Catalog''' command. | To create a raster catalog simply select the desired rasters in the Project Explorer, right-click and select the '''New Raster Catalog''' command. | ||
The figure below shows a sample | The figure below shows a sample of the ''Raster Catalog'' dialog. | ||
[[Image:raster_catalog_table.png|thumb|none|380 px|Example | [[Image:raster_catalog_table.png|thumb|none|380 px|Example of the ''Raster Catalog'' dialog.]] | ||
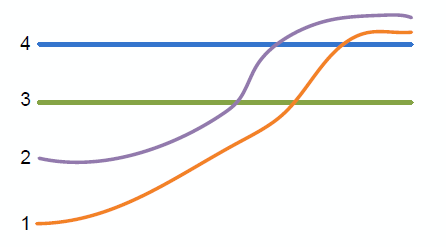
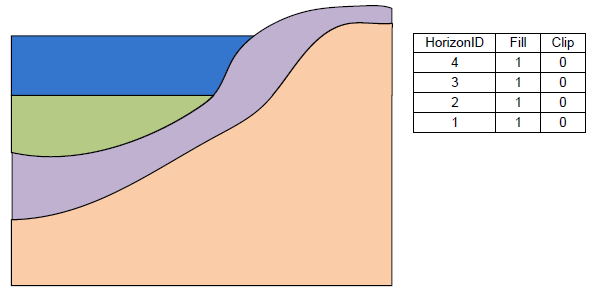
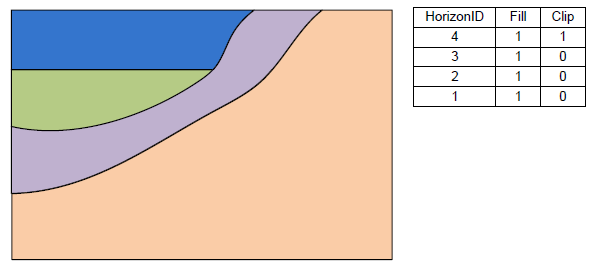
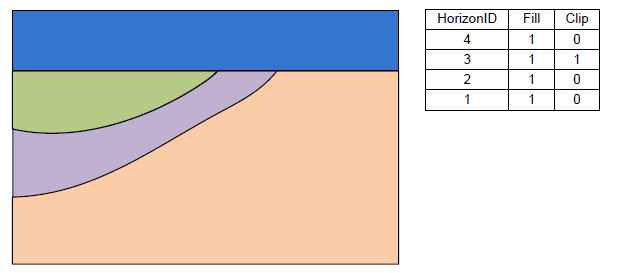
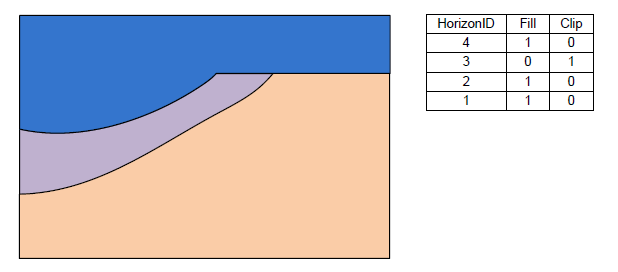
In the first column of the table selects the raster. Then enter a ''Horizon ID'' and the associated material. There are two additional fields: ''Fill'' and ''Clip''. If the ''Fill'' field is turned on then the raster will be used in the interpolation process for the associated horizon. If the ''Clip'' field is turned on then any horizon surface with a horizon id less than the associated horizon id will be clipped to this surface. The following images show examples of the effect of the ''Clip'' field. | In the first column of the table selects the raster. Then enter a ''Horizon ID'' and the associated material. There are two additional fields: ''Fill'' and ''Clip''. If the ''Fill'' field is turned on then the raster will be used in the interpolation process for the associated horizon. If the ''Clip'' field is turned on then any horizon surface with a horizon id less than the associated horizon id will be clipped to this surface. The following images show examples of the effect of the ''Clip'' field. | ||
