WMS:Project Explorer Overview: Difference between revisions
| Line 19: | Line 19: | ||
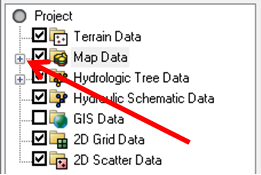
The data folders of each module behave similar to ''Windows Explorer'', except there is an included check box which controls the display of the folder, or data object and all objects underneath. The ''Project Explorer'' can be expanded/contracted by selecting the + or - box at the left side as shown below. | The data folders of each module behave similar to ''Windows Explorer'', except there is an included check box which controls the display of the folder, or data object and all objects underneath. The ''Project Explorer'' can be expanded/contracted by selecting the + or - box at the left side as shown below. | ||
:[[Image:WMS ProjectExplorer2. | :[[Image:WMS ProjectExplorer2.png]] | ||
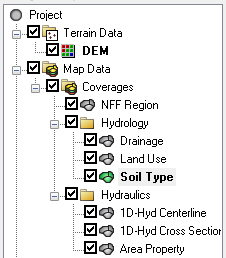
The display of all objects within a folder, or individual data object can be turned on or off using the check box at the left side as shown below. | The display of all objects within a folder, or individual data object can be turned on or off using the check box at the left side as shown below. | ||
Revision as of 15:19, 19 October 2015
The Project Explorer is located at the left side of the WMS window by default, but it can be moved to anywhere on the window since it is a "dockable" toolbar. The Project Explorer contains a hierarchical representation of the data associated with a modeling project.
The Project Explorer manages the data in multiple ways, including creation of new data objects, deleting data objects, and the control of display.
Basic Project Explorer Manipulation
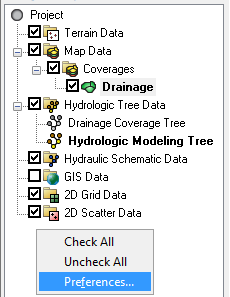
When WMS is initiated an empty folder for each of the data modules is created and displayed in the Project Explorer (previous versions only displayed the folder for the active module). New datasets (TINs, coverages, etc.) can be created by right-clicking on the folders or by opening existing files. A preferences dialog can be opened to control display and default settings/behaviors in the Project Explorer by right-clicking in the empty space of the Project Explorer.
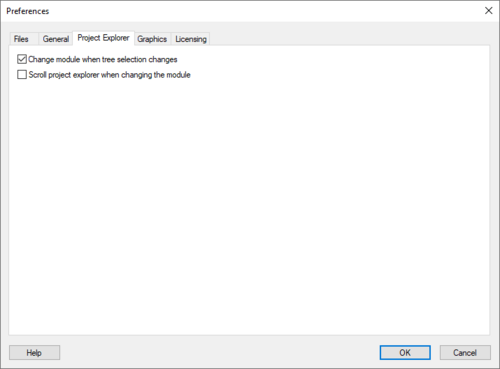
The preferences dialog can be used to control the following:
- By default WMS will not switch modules when selecting one of the folders, or data objects within a folder from the Project Explorer, but a user can change the preferences so that each time a data folder/object is selected WMS automatically switches to that modules as if the module icon had been simultaneously selected
- The time step window used with transient datasets of TINs, grids, and scatter points is not shown at the bottom of the Project Explorer unless such a dataset exists and the TIN, grid, or scatter point set is selected. An option can be toggled on so that it always appears as it did in previous versions.
- The scroll project explorer when changing the module option forces WMS to scroll the Project Explorer such that the data folder corresponding to the active module appears at the top of the window.
- WMS 8.0 deals with images differently than past versions. The Image Preferences tab controls these options, including building pyramids and image conversion.
The data folders of each module behave similar to Windows Explorer, except there is an included check box which controls the display of the folder, or data object and all objects underneath. The Project Explorer can be expanded/contracted by selecting the + or - box at the left side as shown below.
The display of all objects within a folder, or individual data object can be turned on or off using the check box at the left side as shown below.
Creating Data Objects and Folders
New folders and data objects are created by right-clicking the mouse on the folder where the new object is to be stored (new folder and data objects are created automatically when reading new files).
Data objects can be stored within folders, or directly under the main folder for each module. Folders and data objects can be renamed and moved within the Project Explorer structure of a given module. The entire Project Explorer structure is saved as part of a project file, and not as part of a module file such as a TIN file or a MAP file. So in order to restore the entire Project Explorer, it must be done as part of a project file.
Project Explorer Contents By Module
The contents of the Project Explorer vary, depending on which module is active. Pop-up menus are available for folders and files within the Project Explorer and these menus vary for the different data objects available. In general each folder and object has a pop up menu that can be accessed using the right mouse button that include the ability to create, delete, rename, and control properties.
Specific behaviors and contents for the Project Explorer are provided for each module:
Related Topics
WMS – Watershed Modeling System | ||
|---|---|---|
| Modules: | Terrain Data • Drainage • Map • Hydrologic Modeling • River • GIS • 2D Grid • 2D Scatter |  |
| Models: | CE-QUAL-W2 • GSSHA • HEC-1 • HEC-HMS • HEC-RAS • HSPF • MODRAT • NSS • OC Hydrograph • OC Rational • Rational • River Tools • Storm Drain • SMPDBK • SWMM • TR-20 • TR-55 | |
| Toolbars: | Modules • Macros • Units • Digitize • Static Tools • Dynamic Tools • Drawing • Get Data Tools | |
| Aquaveo | ||


