GMS:MF6 LKT Package: Difference between revisions
From XMS Wiki
Jump to navigationJump to search
(Created page with "__NOINDEX__ {{Version GMS 10.6}} {{MODFLOW 6 Beta}} {{MODFLOW 6 Links}} thumb|500px|right|The ''Lake Transport (LKT) Package'' dialog The ''Lake T...") |
|||
| (8 intermediate revisions by the same user not shown) | |||
| Line 1: | Line 1: | ||
{{MODFLOW 6 Beta}} | {{MODFLOW 6 Beta}} | ||
{{MODFLOW 6 Links}} | {{MODFLOW 6 Links}} | ||
| Line 12: | Line 10: | ||
*''OPTIONS'' section – Options and settings: | *''OPTIONS'' section – Options and settings: | ||
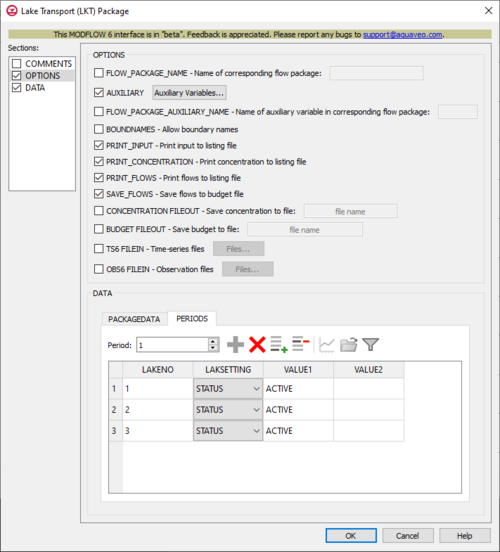
** ''FLOW_PACKAGE_NAME'' – This allows the name of the corresponding flow package to be specified. Turning this on will activate a textbox to the right where this can be entered. If this isn't specified, then the corresponding flow package will need to have the same name as this advanced transport package (the name associated with this package in the GWT name file). | ** ''FLOW_PACKAGE_NAME'' – This allows the name of the corresponding flow package to be specified. Turning this on will activate a textbox to the right where this can be entered. If this isn't specified, then the corresponding flow package will need to have the same name as this advanced transport package (the name associated with this package in the GWT name file). | ||
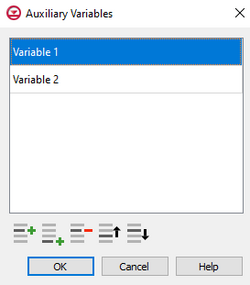
** ''AUXILIARY'' – This allows an array of one or more auxiliary variables to be named. There are no limits to the number of auxiliary variables that can be provided, but subsequent blocks will require data for each of the auxiliary variables that are defined. Turning this on will activate an '''Auxiliary Variables...''' button. Clicking the button will bring up an ''Auxiliary Variables'' dialog | ** ''AUXILIARY'' – This allows an array of one or more auxiliary variables to be named. There are no limits to the number of auxiliary variables that can be provided, but subsequent blocks will require data for each of the auxiliary variables that are defined. Turning this on will activate an '''Auxiliary Variables...''' button. Clicking the button will bring up an [[#Auxiliary_Variables_Dialog|''Auxiliary Variables'']] dialog. | ||
** ''FLOW_PACKAGE_AUXILIARY_NAME'' – This allows the name of an auxiliary variable in the corresponding flow package to be specified. Turning this on will activate a textbox to the right where this can be entered. If this is specified, then this advanced transport package's simulated concentrations will be copied into the auxiliary variable specified with the entered name. If the flow package does not have an auxiliary variable with this name, then the program will terminate with an error. This option will have no effect if the flows for this advanced transport package are read from a file. | ** ''FLOW_PACKAGE_AUXILIARY_NAME'' – This allows the name of an auxiliary variable in the corresponding flow package to be specified. Turning this on will activate a textbox to the right where this can be entered. If this is specified, then this advanced transport package's simulated concentrations will be copied into the auxiliary variable specified with the entered name. If the flow package does not have an auxiliary variable with this name, then the program will terminate with an error. This option will have no effect if the flows for this advanced transport package are read from a file. | ||
** ''BOUNDNAMES'' – This indicates that boundary names are allowed to be provided with the list of lake cells. This will add the ''BOUNDNAME'' column to the spreadsheet in the ''DATA'' section. | ** ''BOUNDNAMES'' – This indicates that boundary names are allowed to be provided with the list of lake cells. This will add the ''BOUNDNAME'' column to the spreadsheet in the ''DATA'' section. | ||
| Line 26: | Line 19: | ||
** ''CONCENTRATION FILEOUT'' – This allows concentration information to be saved to a specifically defined binary output file. | ** ''CONCENTRATION FILEOUT'' – This allows concentration information to be saved to a specifically defined binary output file. | ||
** ''BUDGET FILEOUT'' – This allows budget information to be saved to a specifically defined binary output file. | ** ''BUDGET FILEOUT'' – This allows budget information to be saved to a specifically defined binary output file. | ||
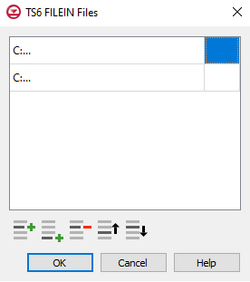
** ''TS6 FILEIN'' – This allows time series files to be used as input to assign time-varying values. Specifying this option will allow a '''Files...''' button to its right to be clicked. Doing so will bring up a ''Files'' dialog | ** ''TS6 FILEIN'' – This allows time series files to be used as input to assign time-varying values. Specifying this option will allow a '''Files...''' button to its right to be clicked. Doing so will bring up a [[#Time_Series_Files_Dialog|''Files'']] dialog. | ||
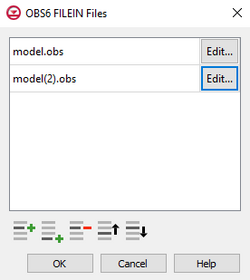
** ''OBS6 FILEIN'' – This allows observations files to be used as input. Specifying this option will allow a '''Files...''' button to its right to be clicked. Doing so will bring up a [[#Observation_Files_Dialog|''Files'']] dialog. | |||
** ''OBS6 FILEIN'' – This allows observations files to be used as input. Specifying this option will allow a '''Files...''' button to its right to be clicked. Doing so will bring up a ''Files'' dialog | |||
*''DATA'' section – This deals with the ''DATA'' block. | *''DATA'' section – This deals with the ''DATA'' block. | ||
** ''PACKAGEDATA'' – This deals with the PACKAGEDATA block. | ** ''PACKAGEDATA'' – This deals with the PACKAGEDATA block. | ||
| Line 50: | Line 33: | ||
*** '''Define Period''' – This button will allow a period to be defined. This will be active when no period has yet been defined, and it may gray out once one has been created. | *** '''Define Period''' – This button will allow a period to be defined. This will be active when no period has yet been defined, and it may gray out once one has been created. | ||
*** '''Delete Period''' – This button will delete the selected period. A dialog warning will come up first asking the user to confirm their decision to delete the period. | *** '''Delete Period''' – This button will delete the selected period. A dialog warning will come up first asking the user to confirm their decision to delete the period. | ||
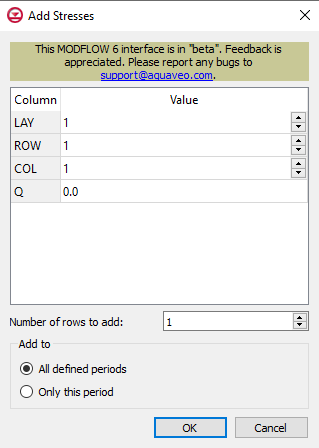
*** '''Add Rows''' – This button will bring up an ''Add Stresses'' dialog. The following options can be used to help in adding the stresses: | *** '''Add Rows''' – This button will bring up an [[#Add_Stresses_Dialog|''Add Stresses'']] dialog. <!--The following options can be used to help in adding the stresses: | ||
**** Columns and Values – Numeric updowns, drop-downs, and textboxes can be used to enter the values for their relevant columns for all the new stresses. These may include columns that are not actually present in the spreadsheet. | **** Columns and Values – Numeric updowns, drop-downs, and textboxes can be used to enter the values for their relevant columns for all the new stresses. These may include columns that are not actually present in the spreadsheet. | ||
**** ''Number of rows to add'' – A numeric updown can be used to enter the number of rows that will be added to the spreadsheet. | **** ''Number of rows to add'' – A numeric updown can be used to enter the number of rows that will be added to the spreadsheet. | ||
**** ''Add to'' – There are two different options, only one of which can be selected at a time. | **** ''Add to'' – There are two different options, only one of which can be selected at a time. | ||
***** ''All defined periods'' – These stresses will be added to all the periods that have been defined. | ***** ''All defined periods'' – These stresses will be added to all the periods that have been defined. | ||
***** ''Only this period'' – These stresses will be added only to the currently selected period. | ***** ''Only this period'' – These stresses will be added only to the currently selected period.--> | ||
*** '''Delete Rows''' – This button will delete all of the stresses. A dialog warning will come up first asking the user to confirm their decision to delete the stresses. The dialog will also give them the option to either '''Delete From All Periods''' or '''Delete From Just This Period'''. | *** '''Delete Rows''' – This button will delete all of the stresses. A dialog warning will come up first asking the user to confirm their decision to delete the stresses. The dialog will also give them the option to either '''Delete From All Periods''' or '''Delete From Just This Period'''. | ||
*** '''Plot All Periods''' – This will allow the user to plot all the periods that have been defined. | *** '''Plot All Periods''' – This will allow the user to plot all the periods that have been defined. | ||
*** '''Open Time Series''' – This will allow the user to open a time series file. | *** '''Open Time Series''' – This will allow the user to open a time series file. | ||
*** '''Filter on Selected Cells''' – | *** '''Filter on Selected Cells''' – If UGrid cells are selected when the dialog is opened, this button causes the table to only display those rows that correspond to the selected cells. | ||
*** ''LAKENO'' – This column represents the LAKENO integer values, which define the lake numbers associated with the PERIOD data. These values must be greater than zero and less than or equal to the separately defined NLAKES value. | *** ''LAKENO'' – This column represents the LAKENO integer values, which define the lake numbers associated with the PERIOD data. These values must be greater than zero and less than or equal to the separately defined NLAKES value. | ||
*** ''LAKSETTING'' – This column represents the LAKSETTING keywords, which can be used to start LAKSETTING strings (lines of information parsed into a keyword and values). These are used to assign the concentration associated with the corresponding flow terms. Concentrations cannot be specified for all flow terms (ex. The Lake Package supports a "WITHDRAWAL" flow term. If this is active, water will be withdrawn from the lake at its calculated concentration.). These keywords are assigned in a drop-down, which can be selected to one of the following options: | *** ''LAKSETTING'' – This column represents the LAKSETTING keywords, which can be used to start LAKSETTING strings (lines of information parsed into a keyword and values). These are used to assign the concentration associated with the corresponding flow terms. Concentrations cannot be specified for all flow terms (ex. The Lake Package supports a "WITHDRAWAL" flow term. If this is active, water will be withdrawn from the lake at its calculated concentration.). These keywords are assigned in a drop-down, which can be selected to one of the following options: | ||
| Line 73: | Line 56: | ||
*** ''VALUE1'' – This column is for the first value following the keyword specified in the ''LAKSETTING'' column. For most keywords, only this column will be needed. | *** ''VALUE1'' – This column is for the first value following the keyword specified in the ''LAKSETTING'' column. For most keywords, only this column will be needed. | ||
*** ''VALUE2'' – This column is for the second value following the keyword specified in the ''LAKSETTING'' column. Only "AUXILIARY" requires this, as the first value will be an AUXNAME and the second value will be an AUXVAL. | *** ''VALUE2'' – This column is for the second value following the keyword specified in the ''LAKSETTING'' column. Only "AUXILIARY" requires this, as the first value will be an AUXNAME and the second value will be an AUXVAL. | ||
{{Auxiliary Variables Dialog}} | |||
{{MF6 Time Series Files Dialog}} | |||
{{MF6 Observation Files Dialog}} | |||
{{MF6 Add Stresses Dialog}} | |||
| Line 80: | Line 67: | ||
{{Navbox GMS}} | {{Navbox GMS}} | ||
[[Category:MODFLOW 6| | [[Category:MODFLOW 6|lkt]] | ||
[[Category:MODFLOW 6 Dialogs|lkt]] | |||
