GMS:MF6 SRC Package: Difference between revisions
From XMS Wiki
Jump to navigationJump to search
No edit summary |
No edit summary |
||
| (6 intermediate revisions by the same user not shown) | |||
| Line 1: | Line 1: | ||
{{MODFLOW 6 Beta}} | {{MODFLOW 6 Beta}} | ||
{{MODFLOW 6 Links}} | {{MODFLOW 6 Links}} | ||
| Line 17: | Line 15: | ||
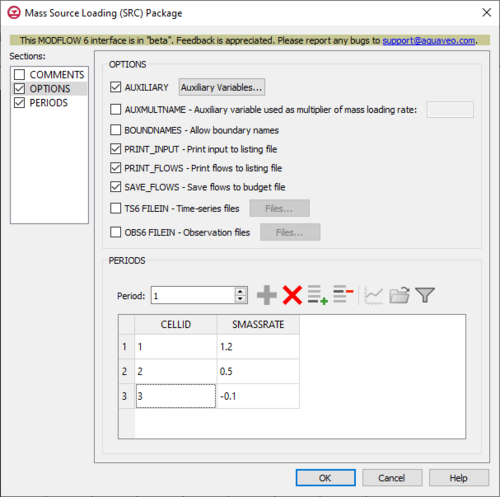
** ''PRINT_FLOWS'' – This indicates that the list of mass source flow rates will be printed to the listing file, for every stress period time step where “BUDGET PRINT” has been specified in Output Control. If ''PRINT_FLOWS'' has been specified but there is no Output Control option, then they will be printed for the last time step of each stress period. | ** ''PRINT_FLOWS'' – This indicates that the list of mass source flow rates will be printed to the listing file, for every stress period time step where “BUDGET PRINT” has been specified in Output Control. If ''PRINT_FLOWS'' has been specified but there is no Output Control option, then they will be printed for the last time step of each stress period. | ||
** ''SAVE_FLOWS'' – This indicates that mass source flow terms will be saved to a budget file (specified in Output Control with "BUDGET FILEOUT"). | ** ''SAVE_FLOWS'' – This indicates that mass source flow terms will be saved to a budget file (specified in Output Control with "BUDGET FILEOUT"). | ||
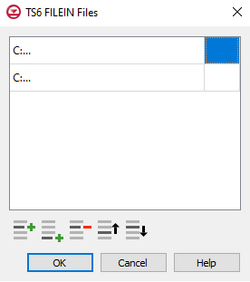
** ''TS6 FILEIN'' – This allows time series files to be used as input to assign time-varying values. Specifying this option will allow a '''Files...''' button to its right to be clicked. Doing so will bring up a ''Files...'' dialog | ** ''TS6 FILEIN'' – This allows time series files to be used as input to assign time-varying values. Specifying this option will allow a '''Files...''' button to its right to be clicked. Doing so will bring up a [[#Time_Series_Files_Dialog|''Files...'']] dialog. | ||
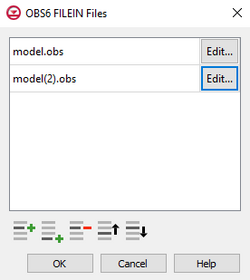
** ''OBS6 FILEIN'' – This allows observations files to be used as input to define observations for the Mass Source package. Specifying this option will allow a '''Files...''' button to its right to be clicked. Doing so will bring up an [[##Observation_Files_Dialog|''Observation Files'']] dialog. | |||
** ''OBS6 FILEIN'' – This allows observations files to be used as input to define observations for the Mass Source package. Specifying this option will allow a '''Files...''' button to its right to be clicked. Doing so will bring up an ''Observation Files'' dialog | |||
*''PERIODS'' section – This deals with the ''PERIODS'' block. | *''PERIODS'' section – This deals with the ''PERIODS'' block. | ||
** ''Period'' – A numeric updown can be used to enter which period is being examined in the spreadsheet. | ** ''Period'' – A numeric updown can be used to enter which period is being examined in the spreadsheet. | ||
** '''Define Period''' – This button will allow a period to be defined. This will be active when no period has yet been defined, and it may gray out once one has been created. | ** '''Define Period''' – This button will allow a period to be defined. This will be active when no period has yet been defined, and it may gray out once one has been created. | ||
** '''Delete Period''' – This button will delete the selected period. A dialog warning will come up first asking the user to confirm their decision to delete the period. | ** '''Delete Period''' – This button will delete the selected period. A dialog warning will come up first asking the user to confirm their decision to delete the period. | ||
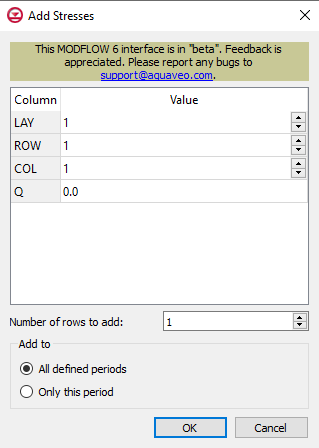
** '''Add Rows''' – This button will bring up an ''Add Stresses'' dialog. The following options can be used to help in adding the stresses: | ** '''Add Rows''' – This button will bring up an [[#Add_Stresses_Dialog|''Add Stresses'']] dialog. <!--The following options can be used to help in adding the stresses: | ||
*** Columns and Values – Numeric updowns and textboxes can be used to enter the values for their relevant columns for all the new stresses. These may include columns that are not actually present in the spreadsheet. | *** Columns and Values – Numeric updowns and textboxes can be used to enter the values for their relevant columns for all the new stresses. These may include columns that are not actually present in the spreadsheet. | ||
*** ''Number of rows to add'' – A numeric updown can be used to enter the number of rows that will be added to the spreadsheet. | *** ''Number of rows to add'' – A numeric updown can be used to enter the number of rows that will be added to the spreadsheet. | ||
*** ''Add to'' – There are two different options, only one of which can be selected at a time. | *** ''Add to'' – There are two different options, only one of which can be selected at a time. | ||
**** ''All defined periods'' – These stresses will be added to all the periods that have been defined. | **** ''All defined periods'' – These stresses will be added to all the periods that have been defined. | ||
**** ''Only this period'' – These stresses will be added only to the currently selected period. | **** ''Only this period'' – These stresses will be added only to the currently selected period.--> | ||
** '''Delete Rows''' – This button will delete all of the stresses. A dialog warning will come up first asking the user to confirm their decision to delete the stresses. The dialog will also give them the option to either '''Delete From All Periods''' or '''Delete From Just This Period'''. | ** '''Delete Rows''' – This button will delete all of the stresses. A dialog warning will come up first asking the user to confirm their decision to delete the stresses. The dialog will also give them the option to either '''Delete From All Periods''' or '''Delete From Just This Period'''. | ||
** '''Plot All Periods''' – This will allow the user to plot all the periods that have been defined. | ** '''Plot All Periods''' – This will allow the user to plot all the periods that have been defined. | ||
** '''Open Time Series''' – This will allow the user to open a time series file. | ** '''Open Time Series''' – This will allow the user to open a time series file. | ||
** '''Filter on Selected Cells''' – | ** '''Filter on Selected Cells''' – If UGrid cells are selected when the dialog is opened, this button causes the table to only display those rows that correspond to the selected cells. | ||
** ''CELLID'' – This will display differently in the spreadsheet based on what type of grid is used for the simulation, specifically which type of DIS* input file is used in the model. The CELLID is the cell identifier, and the type of DIS* file used will change what will be determined to be the CELLID. | ** ''CELLID'' – This will display differently in the spreadsheet based on what type of grid is used for the simulation, specifically which type of DIS* input file is used in the model. The CELLID is the cell identifier, and the type of DIS* file used will change what will be determined to be the CELLID. | ||
*** For a structured grid that uses a DIS input file, these columns will be: | *** For a structured grid that uses a DIS input file, these columns will be: | ||
| Line 68: | Line 56: | ||
{{Navbox GMS}} | {{Navbox GMS}} | ||
[[Category:MODFLOW 6|SRC]] | [[Category:MODFLOW 6|SRC]] | ||
[[Category:MODFLOW 6 Dialogs|src]] | |||
