User:Jmonson/MODFLOW 6 Packages: Difference between revisions
From XMS Wiki
Jump to navigationJump to search
No edit summary |
|||
| (226 intermediate revisions by 3 users not shown) | |||
| Line 1: | Line 1: | ||
__NOINDEX__ | __NOINDEX__ | ||
{{ | {{Version GMS 10.5}} | ||
{{MODFLOW Links}} | {{MODFLOW 6 Links}} | ||
There are many different packages available in MODFLOW 6. | There are many different packages available in MODFLOW 6. | ||
| Line 22: | Line 22: | ||
***"Years" | ***"Years" | ||
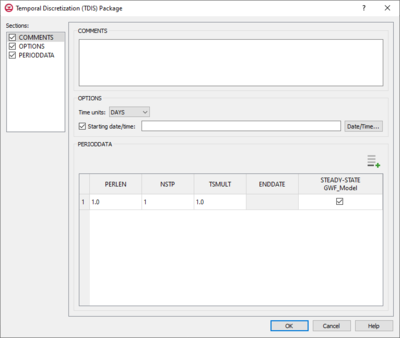
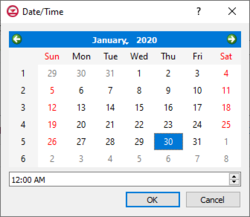
**''Start date/time'' – Turn on to enable setting a start date/time. Click the '''Date/Time...''' button to bring up the [[#Date/Time Dialog|''Date/Time'' dialog]]. The time can also be manually entered using "YYYY-MM-DDTHH:MM:SS" format. The "T" in the middle divides the date from the time. | **''Start date/time'' – Turn on to enable setting a start date/time. Click the '''Date/Time...''' button to bring up the [[#Date/Time Dialog|''Date/Time'' dialog]]. The time can also be manually entered using "YYYY-MM-DDTHH:MM:SS" format. The "T" in the middle divides the date from the time. | ||
*''PeriodData'' section – Contains a spreadsheet listing periods. An [[File: | *''PeriodData'' section – Contains a spreadsheet listing periods. An [[File:Row-add.svg|12px]] '''Add Row''' button is found at the top rigth of the spreadsheet. Right-clicking on the row number in the spreadsheet gives a menu that allows inserting, deleting, copying, or pasting a row. The columns in the spreadsheet include: | ||
**''PERLEN'' – The length of a stress period. The default value is "1.0". | **''PERLEN'' – The length of a stress period. The default value is "1.0". | ||
**''NSTP'' – The number of time steps in a stress period. The default value is "1". | **''NSTP'' – The number of time steps in a stress period. The default value is "1". | ||
| Line 139: | Line 139: | ||
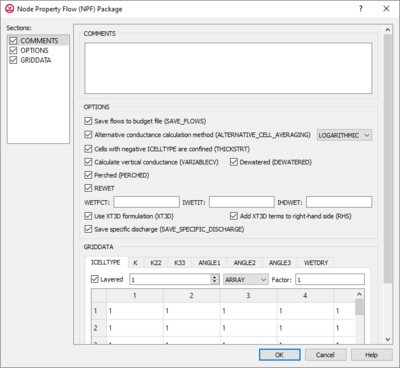
*''Comments'' section – Enter general alphanumeric comments. Comments entered here get written at the top of the file, preceded by a '#' symbol. | *''Comments'' section – Enter general alphanumeric comments. Comments entered here get written at the top of the file, preceded by a '#' symbol. | ||
*''Options'' section | *''Options'' section | ||
**''Save flows to budget file (SAVE_FLOWS)'' – Turn on to write cell-by-cell flow terms to the file specified with "BUDGET SAVE FILE" in [[GMS: | **''Save flows to budget file (SAVE_FLOWS)'' – Turn on to write cell-by-cell flow terms to the file specified with "BUDGET SAVE FILE" in [[GMS:MF6 OC Package|Output Control]]. | ||
**''Alternative conductance calculation method (ALTERNATIVE_CELL_AVERAGING)'' – Turn on to use an alternative method for calculating the conductance for horizontal cell connections. | **''Alternative conductance calculation method (ALTERNATIVE_CELL_AVERAGING)'' – Turn on to use an alternative method for calculating the conductance for horizontal cell connections. | ||
***"Logarithmic" – | ***"Logarithmic" – | ||
| Line 154: | Line 154: | ||
**''Use XT3D formulation (XT3D)'' – Turn on to use the XT3D formulation. | **''Use XT3D formulation (XT3D)'' – Turn on to use the XT3D formulation. | ||
***''Add XT3D terms to right-hand side (RHS)'' – The XT3D additional terms will be added to the right-hand side instead of the coefficient matrix. | ***''Add XT3D terms to right-hand side (RHS)'' – The XT3D additional terms will be added to the right-hand side instead of the coefficient matrix. | ||
**''Save specific discharge (SAVE_SPECIFIC_DISCHARGE)'' – Turn on to calculate x, y, and z components of specific discharge at cell centers and write them to the cell-by-cell flow file as specified with "BUDGET SAVE FILE" in [[GMS: | **''Save specific discharge (SAVE_SPECIFIC_DISCHARGE)'' – Turn on to calculate x, y, and z components of specific discharge at cell centers and write them to the cell-by-cell flow file as specified with "BUDGET SAVE FILE" in [[GMS:MF6 OC Package|Output Control]]. | ||
*''GridData'' section – Contains a number of tabs, including: | *''GridData'' section – Contains a number of tabs, including: | ||
**''ICELLTYPE'' – A flag for each cell that specifies how saturated thickness is treated. | **''ICELLTYPE'' – A flag for each cell that specifies how saturated thickness is treated. | ||
| Line 233: | Line 233: | ||
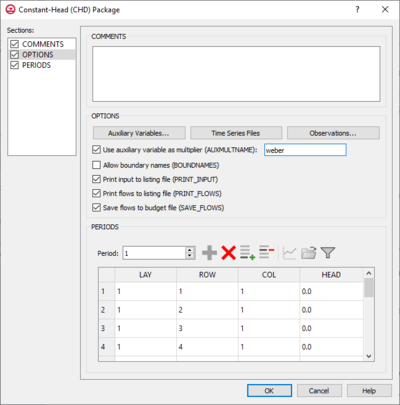
**''Allow boundary names (BOUNDNAMES)'' – Turn on to allow boundary names to be included in the list of constant-head cells. | **''Allow boundary names (BOUNDNAMES)'' – Turn on to allow boundary names to be included in the list of constant-head cells. | ||
**''Print input to listing file (PRINT_INPUT)'' – Turn on to write the list of constant-head information to the listing file immediately after it is read. | **''Print input to listing file (PRINT_INPUT)'' – Turn on to write the list of constant-head information to the listing file immediately after it is read. | ||
**''Print flows to listing file (PRINT_FLOWS)'' – Turn on to write the list of constant-head flow rates to the listing file for every stress period time step in which "BUDGET PRINT" is specified in [[GMS: | **''Print flows to listing file (PRINT_FLOWS)'' – Turn on to write the list of constant-head flow rates to the listing file for every stress period time step in which "BUDGET PRINT" is specified in [[GMS:MF6 OC Package|Output Control]]. | ||
**''Save flows to budget file (SAVE_FLOWS)'' – Turn on to write constant-head flow terms to the file specified with "BUDGET FILEOUT" in [[GMS: | **''Save flows to budget file (SAVE_FLOWS)'' – Turn on to write constant-head flow terms to the file specified with "BUDGET FILEOUT" in [[GMS:MF6 OC Package|Output Control]]. | ||
**''Use with Water Mover (MVR) package (MOVER)'' – Turn on to allows this instance of the Constant-Head Package to be used with the Water Mover (MVR) Package. | **''Use with Water Mover (MVR) package (MOVER)'' – Turn on to allows this instance of the Constant-Head Package to be used with the Water Mover (MVR) Package. | ||
*''Periods'' section – Contains the following: | *''Periods'' section – Contains the following: | ||
| Line 240: | Line 240: | ||
**'''Define Period''' [[File:Add Note Icon.svg|14px]] – If no period is defined, click to make the spreadsheet editable. | **'''Define Period''' [[File:Add Note Icon.svg|14px]] – If no period is defined, click to make the spreadsheet editable. | ||
**'''Delete Period''' [[File:GMS Delete Icon.svg|14px]] – Click to delete the existing period. | **'''Delete Period''' [[File:GMS Delete Icon.svg|14px]] – Click to delete the existing period. | ||
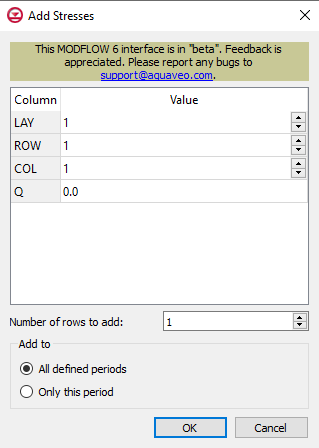
**'''Add Rows''' [[File: | **'''Add Rows''' [[File:Row-add.svg|14px]] – Click to bring up the [[#Add Stresses Dialog|''Add Stresses'' dialog]]. | ||
**'''Delete Rows''' [[File: | **'''Delete Rows''' [[File:Row-delete.svg|14px]] – Click to bring up a dialog with three options: | ||
***'''Delete from All Periods''' – Click to delete matching stresses from all periods. | ***'''Delete from All Periods''' – Click to delete matching stresses from all periods. | ||
***'''Delete from Just This Period''' – Click to delete matching stresses from just this period. | ***'''Delete from Just This Period''' – Click to delete matching stresses from just this period. | ||
**'''Plot All Periods''' [[File:Mf6time-series.svg|14px]] – Click to bring up the [[GMS:XY Series Editor|''XY Series Editor'' dialog]]. Requires that a cell be selected in the table. | |||
**'''Plot All Periods''' [[File: | **'''Open Time Series''' [[File:Open Macro.svg|14px]] – Only available if a time series has previously been defined, and the time series is specifically called in the ''Head'' column. For example, if a time series named "ts_1" is defined, enter "ts_1" in the Head column of the appropriate row. Click to bring up the | ||
**'''Open Time Series''' [[File:Open Macro.svg|14px]] – Click to bring up the | **'''Filter on Selected Cells''' [[File:Mf6filter.svg|14px]] – Click to turn on filtering on the selected cells. | ||
**'''Filter on Selected Cells''' [[File: | *''Table'' – Contains the following: | ||
**'''LAY''' – Used to specify certain layers of the module. | |||
**'''ROW''' – Used to specify certain rows of the module. | |||
**'''COL''' – Used to specify certain columns of the module. | |||
**'''HEAD''' – Represents the head at the boundary. | |||
===Drain (DRN) Package=== | ===Drain (DRN) Package=== | ||
| Line 264: | Line 268: | ||
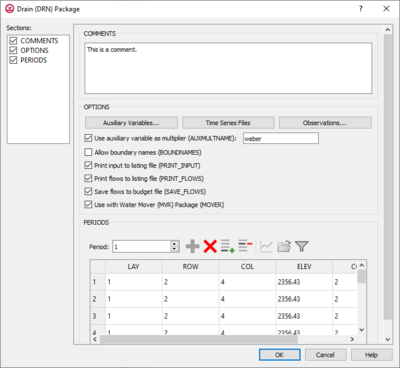
**''Allow boundary names (BOUNDNAMES)'' – Turn on to allow boundary names to be included in the list of drain cells. | **''Allow boundary names (BOUNDNAMES)'' – Turn on to allow boundary names to be included in the list of drain cells. | ||
**''Print input to listing file (PRINT_INPUT)'' – Turn on to write the list of drain information to the listing file immediately after it is read. | **''Print input to listing file (PRINT_INPUT)'' – Turn on to write the list of drain information to the listing file immediately after it is read. | ||
**''Print flows to listing file (PRINT_FLOWS)'' – Turn on to write the list of drain flow rates to the listing file for every stress period time step in which "BUDGET PRINT" is specified in [[GMS: | **''Print flows to listing file (PRINT_FLOWS)'' – Turn on to write the list of drain flow rates to the listing file for every stress period time step in which "BUDGET PRINT" is specified in [[GMS:MF6 OC Package|Output Control]]. | ||
**''Save flows to budget file (SAVE_FLOWS)'' – Turn on to write drain flow terms to the file specified with "BUDGET FILEOUT" in [[GMS: | **''Save flows to budget file (SAVE_FLOWS)'' – Turn on to write drain flow terms to the file specified with "BUDGET FILEOUT" in [[GMS:MF6 OC Package|Output Control]]. | ||
**''Use with Water Mover (MVR) package (MOVER)'' – Turn on to allows this instance of the Drain Package to be used with the Water Mover (MVR) Package. | **''Use with Water Mover (MVR) package (MOVER)'' – Turn on to allows this instance of the Drain Package to be used with the Water Mover (MVR) Package. | ||
*''Periods'' section – Contains the following: | *''Periods'' section – Contains the following: | ||
| Line 271: | Line 275: | ||
**'''Define Period''' [[File:Add Note Icon.svg|14px]] – If no period is defined, click to make the spreadsheet editable. | **'''Define Period''' [[File:Add Note Icon.svg|14px]] – If no period is defined, click to make the spreadsheet editable. | ||
**'''Delete Period''' [[File:GMS Delete Icon.svg|14px]] – Click to delete the existing period. | **'''Delete Period''' [[File:GMS Delete Icon.svg|14px]] – Click to delete the existing period. | ||
**'''Add Rows''' [[File: | **'''Add Rows''' [[File:Row-add.svg|14px]] – Click to bring up the [[#Add Stresses Dialog|''Add Stresses'' dialog]]. | ||
**'''Delete Rows''' [[File: | **'''Delete Rows''' [[File:Row-delete.svg|14px]] – Click to bring up a dialog with three options: | ||
***'''Delete from All Periods''' – Click to delete matching stresses from all periods. | ***'''Delete from All Periods''' – Click to delete matching stresses from all periods. | ||
***'''Delete from Just This Period''' – Click to delete matching stresses from just this period. | ***'''Delete from Just This Period''' – Click to delete matching stresses from just this period. | ||
**'''Plot All Periods''' [[File:Mf6time-series.svg|14px]] – Click to bring up the [[GMS:XY Series Editor|''XY Series Editor'' dialog]]. Requires that a cell be selected in the table. | |||
**'''Plot All Periods''' [[File: | |||
**'''Open Time Series''' [[File:Open Macro.svg|14px]] – Click to bring up the | **'''Open Time Series''' [[File:Open Macro.svg|14px]] – Click to bring up the | ||
**'''Filter on Selected Cells''' [[File: | **'''Filter on Selected Cells''' [[File:Mf6filter.svg|14px]] – Click to turn on filtering on the selected cells. | ||
*''Table'' – Contains the following: | |||
**'''LAY''' – Used to specify certain layers of the module. | |||
**'''ROW''' – Used to specify certain rows of the module. | |||
**'''COL''' – Used to specify certain columns of the module. | |||
**'''ELEV''' – Represents the elevation of the drain. | |||
**'''COND''' – Represents the hydraulic conductance between the aquifer and the drain. | |||
===Evapotranspiration (EVT) Package=== | ===Evapotranspiration (EVT) Package=== | ||
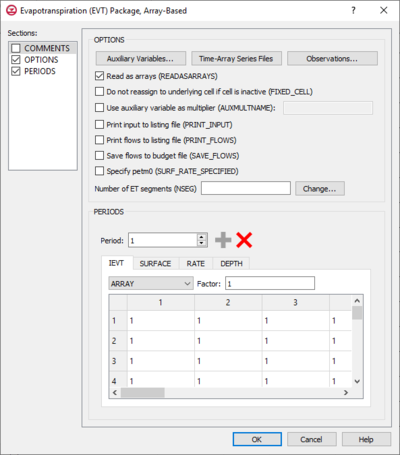
[[File: | [[File:MF6-EVT Package.png|thumb|400px|right|The ''Evapotranspiration (EVT) Package'' dialog]] | ||
The ''Evapotranspiration (EVT) Package'' dialog is accessed by double-clicking on the EVT package under a MODFLOW 6 simulation in the Project Explorer. It contains the following sections and options: | |||
*''Sections'' list – A list of sections that can be turned on or off: | |||
**''Comments'' – Turn on to make the ''Comments'' section visible. | |||
**''Options'' – Turn on to make the ''Options'' section visible. | |||
**''PeriodData'' – Turn on to make the ''PeriodData'' section visible. This section is on by default. | |||
*''Comments'' section – Enter general alphanumeric comments. Comments entered here get written at the top of the file, preceded by a '#' symbol. | |||
*''Options'' section – Temporal options and settings: | |||
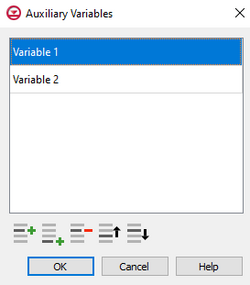
**'''Auxiliary Variables...''' – Click to bring up the [[#Auxiliary Variables Dialog|''Auxiliary Variables'' dialog]]. | |||
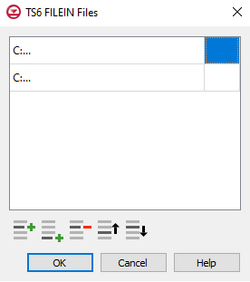
**'''Time Series...''' – Click to bring up the [[#Time Series Files Dialog|''Time Series Files'' dialog]]. | |||
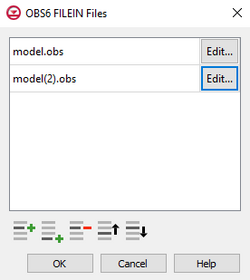
**'''Observations...''' – Click to bring up the [[#Observation Files Dialog|''Observation Files'' dialog]]. | |||
**''Read as arrays (READASARRAYS) – Click to specify to use array-based input in the EVT package. | |||
**''Do not reassign to underlying cell if cell is inactive (FIXED_CELL)'' – Click to indicate that evapotranspiration will not be reassigned to a cell underlying the cell specified in the list if the specified cell is inactive. | |||
**''Use auxiliary variable as multiplier (AUXMULTNAME)'' – Name of auxiliary variable to be used as multiplier of evapotranspiration rate. | |||
**''Print input to listing file (PRINT_INPUT)'' – Turn on to write the list of evapotranspiration information to the listing file immediately after it is read. | |||
**''Print flows to listing file (PRINT_FLOWS)'' – Turn on to write the list of evapotranspiration flow rates to the listing file for every stress period time step in which "BUDGET PRINT" is specified in [[GMS:MF6 OC Package|Output Control]]. | |||
**''Save flows to budget file (SAVE_FLOWS)'' – Turn on to write evapotranspiration flow terms to the file specified with "BUDGET FILEOUT" in [[GMS:MF6 OC Package|Output Control]]. | |||
**''Specify petm0 (SURF_RATE_SPECIFIED)'' – When turned on, indicates that the proportion of the evapotranspiration rate at the ET surface will be specified as PETM0 in list input. | |||
**Number of ET Segments – Allows the documenting of a value that represents the number of ET segments. | |||
***'''Change...''' – Allows an increase or a decrease of the value within the Number of ET Segments field. | |||
*''Periods'' section – Contains the following: | |||
**''Period'' drop-down – Use the '''Increment Up and Down''' [[File:Increment up and down arrows.png|14px]] buttons to select the desired period. | |||
**'''Define Period''' [[File:Add Note Icon.svg|14px]] – If no period is defined, click to make the spreadsheet editable. | |||
**'''Delete Period''' [[File:GMS Delete Icon.svg|14px]] – Click to delete the existing period. | |||
***Table – Contains four tabs: | |||
****''IEVT'' – The layer number that defines the layer in each vertical column. | |||
*****"UNDEFINED" – Indicates that there are no definite variables to be applied. | |||
*****"CONSTANT" – If "Constant" is selected from the drop-down, enter a decimal value in the ''Constant'' field to be applied to all cells in the layer(s). | |||
*****"ARRAY" – If "Array" is selected from the drop-down, enter an integer in the ''factor:'' field to be multiplied to the array after it is read. | |||
*****"TIME-ARRAY SERIES" – Is not supported for ''IEVT'', ''SURFACE'', or ''DEPTH''. | |||
****''SURFACE'' – The elevation of the ET surface. | |||
*****"UNDEFINED" – Indicates that there are no definite variable to be applied. | |||
*****"CONSTANT" – If "Constant" is selected from the drop-down, enter a decimal value in the ''Constant'' field to be applied to all cells in the layer(s). | |||
*****"ARRAY" – If "Array" is selected from the drop-down, enter an integer in the ''factor:'' field to be multiplied to the array after it is read. | |||
*****"TIME-ARRAY SERIES" – Is not supported for ''IEVT'', ''SURFACE'', or ''DEPTH''. | |||
****''RATE'' – The maximum ET flux rate. | |||
*****"UNDEFINED" – Indicates that there are no definite variables to be applied. | |||
*****"CONSTANT" – If "Constant" is selected from the drop-down, enter a decimal value in the ''Constant'' field to be applied to all cells in the layer(s). | |||
*****"ARRAY" – If "Array" is selected from the drop-down, enter an integer in the ''factor:'' field to be multiplied to the array after it is read. | |||
*****"TIME-ARRAY SERIES" – If "Time-Array Series" is selected from the drop-down, indicate which Time-Array Series is being applied in the ''Series:'' field. | |||
****''DEPTH'' – The ET extinction depth. | |||
*****"UNDEFINED" – Indicates that there are no definite variable to be applied. | |||
*****"CONSTANT" – If "Constant" is selected from the drop-down, enter a decimal value in the ''Constant'' field to be applied to all cells in the layer(s). | |||
*****"ARRAY" – If "Array" is selected from the drop-down, enter an integer in the ''factor:'' field to be multiplied to the array after it is read. | |||
*****"TIME-ARRAY SERIES" – Is not supported for ''IEVT'', ''SURFACE'', or ''DEPTH''. | |||
{{-}} | {{-}} | ||
===GHB=== | ===General-Head (GHB) Package=== | ||
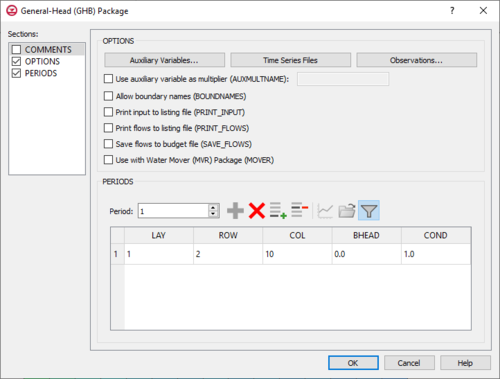
[[File: | [[File:MF6-GHB Package.png|thumb|500px|right|The ''General-Head (GHB) Package'' dialog]] | ||
The ''General-Head (GHB) Package'' dialog is accessed by double-clicking on the GHB package under a MODFLOW 6 simulation in the Project Explorer. It contains the following sections and options: | |||
*''Sections'' list – A list of sections that can be turned on or off: | |||
**''Comments'' – Turn on to make the ''Comments'' section visible. | |||
**''Options'' – Turn on to make the ''Options'' section visible. | |||
**''Periods'' – Turn on to make the ''Periods'' section visible. This section is on by default. | |||
*''Comments'' section – Enter general alphanumeric comments. Comments entered here get written at the top of the file, preceded by a '#' symbol. | |||
*''Options'' section – Contains the following: | |||
**'''Auxiliary Variables...''' – Click to bring up the [[#Auxiliary Variables Dialog|''Auxiliary Variables'' dialog]]. | |||
**'''Time Series...''' – Click to bring up the [[#Time Series Files Dialog|''Time Series Files'' dialog]]. | |||
**'''Observations...''' – Click to bring up the [[#Observation Files Dialog|''Observation Files'' dialog]]. | |||
**''Use auxiliary variable as multiplier (AUXMULTNAME)'' – Name of auxiliary variable to be used as multiplier of general-head boundary conductance. | |||
**''Allow boundary names (BOUNDNAMES)'' – Turn on to allow boundary names to be included in the list of general-head boundary cells. | |||
**''Print input to listing file (PRINT_INPUT)'' – Turn on to write the list of general-head boundary information to the listing file immediately after it is read. | |||
**''Print flows to listing file (PRINT_FLOWS)'' – Turn on to write the list of general-head boundary flow rates to the listing file for every stress period time step in which "BUDGET PRINT" is specified in [[GMS:MF6 OC Package|Output Control]]. | |||
**''Save flows to budget file (SAVE_FLOWS)'' – Turn on to write general-head flow terms to the file specified with "BUDGET FILEOUT" in [[GMS:MF6 OC Package|Output Control]]. | |||
**''Use with Water Mover (MVR) package (MOVER)'' – Turn on to allows this instance of the General-Head Package to be used with the Water Mover (MVR) Package. | |||
*''Periods'' section – Contains the following: | |||
**''Period'' drop-down – Use the '''Increment Up and Down''' [[File:Increment up and down arrows.png|14px]] buttons to select the desired period. | |||
**'''Define Period''' [[File:Add Note Icon.svg|14px]] – If no period is defined, click to make the spreadsheet editable. | |||
**'''Delete Period''' [[File:GMS Delete Icon.svg|14px]] – Click to delete the existing period. | |||
**'''Add Rows''' [[File:Row-add.svg|14px]] – Click to bring up the [[#Add Stresses Dialog|''Add Stresses'' dialog]]. | |||
**'''Delete Rows''' [[File:Row-delete.svg|14px]] – Click to bring up a dialog with three options: | |||
***'''Delete from All Periods''' – Click to delete matching stresses from all periods. | |||
***'''Delete from Just This Period''' – Click to delete matching stresses from just this period. | |||
**'''Plot All Periods''' [[File:Mf6time-series.svg|14px]] – Click to bring up the [[GMS:XY Series Editor|''XY Series Editor'' dialog]]. Requires that a cell be selected in the table. | |||
**'''Open Time Series''' [[File:Open Macro.svg|14px]] – Click to bring up the | |||
**'''Filter on Selected Cells''' [[File:Mf6filter.svg|14px]] – Click to turn on filtering on the selected cells. | |||
*''Table'' – Contains the following: | |||
**'''LAY''' – Used to specify certain layers of the module. | |||
**'''ROW''' – Used to specify certain rows of the module. | |||
**'''COL''' – Used to specify certain columns of the module. | |||
**'''BHEAD''' – Represents the boundary head. | |||
**'''COND''' – Represents the hydraulic conductance between the aquifer cell and the boundary. | |||
{{-}} | {{-}} | ||
===GNC=== | |||
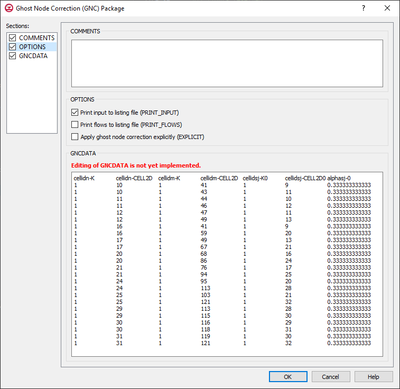
[[File: | ===Ghost-Node Correction (GNC) Package=== | ||
[[File:MF6-gnc package.png|thumb|400px|right|The ''Ghost Node Correction (GNC) Package'' dialog]] | |||
**''Comments'' – Turn on to make the ''Comments'' section visible. | |||
**''Options'' – Turn on to make the ''Options'' section visible. | |||
**''GNCData'' – Turn on to make the ''GNCData'' section visible. This section is on by default. | |||
*''Comments'' section – Enter general alphanumeric comments. Comments entered here get written at the top of the file, preceded by a '#' symbol. | |||
*''Options'' section – Temporal options and settings: | |||
**''Print input to listing file (PRINT_INPUT)'' – If turned on, indicates that the list of GNC information will be written to the listing file after it is read. | |||
**''Print flows to listing file (PRINT_FLOWS)'' – If turned on, indicates that a list of GNC flow rates will be printed to the listing file. | |||
**''Apply ghost node correction explicitly (EXPLICIT)'' – Indicates that the ghost node correction is applied and the correction terms are added to the right-hand side of the matrix. | |||
*''GNCData'' – Area where data specific to GNC and the Ghost Nodes can be reviewed. | |||
{{-}} | {{-}} | ||
===HFB=== | |||
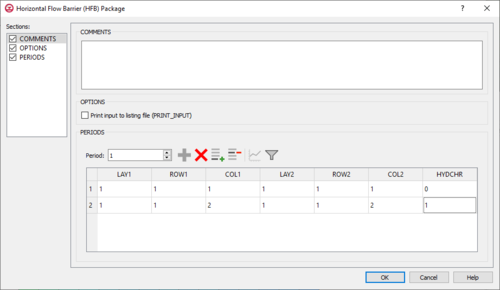
[[File: | ===Horizontal Flow Barrier (HFB) Package=== | ||
[[File:MF6-HFB package.png|thumb|500px|right|The ''Horizontal Flow Barrier (HFB) Package'' dialog]] | |||
The ''Horizontal Flow Barrier (HFB) Package'' dialog is accessed by double-clicking on the HFB package under a MODFLOW 6 simulation in the Project Explorer. It contains the following sections and options: | |||
*''Sections'' list – A list of sections that can be turned on or off: | |||
**''Comments'' – Turn on to make the ''Comments'' section visible. | |||
**''Options'' – Turn on to make the ''Options'' section visible. | |||
**''Periods'' – Turn on to make the ''Periods'' section visible. This section is on by default. | |||
*''Comments'' section – Enter general alphanumeric comments. Comments entered here get written at the top of the file, preceded by a '#' symbol. | |||
*''Options'' section – Temporal options and settings: | |||
**''Print input to listing file (PRINT_INPUT)'' – Turn on to write the list of recharge information to the listing file immediately after it is read. | |||
*''Periods'' section – Contains the following: | |||
**''Period'' drop-down – Use the '''Increment Up and Down''' [[File:Increment up and down arrows.png|14px]] buttons to select the desired period. | |||
**'''Define Period''' [[File:Add Note Icon.svg|14px]] – If no period is defined, click to make the spreadsheet editable. | |||
**'''Delete Period''' [[File:GMS Delete Icon.svg|14px]] – Click to delete the existing period. | |||
*''Table'' – Contains the following: | |||
**'''LAY1''' – Identifier for the first layer. | |||
**'''ROW1''' – Identifier for the first row. | |||
**'''COL1''' – Identifier for the first column. | |||
**'''LAY2''' – Identifier for the second layer. | |||
**'''ROW2''' – Identifier for the second row. | |||
**'''COL2''' – Identifier for the second column. | |||
**'''HYDCHR''' – The hydraulic characteristic of the horizontal-flow barrier. When this variable is negative it multiplied by the conductance of two cells. | |||
{{-}} | {{-}} | ||
===LAK=== | |||
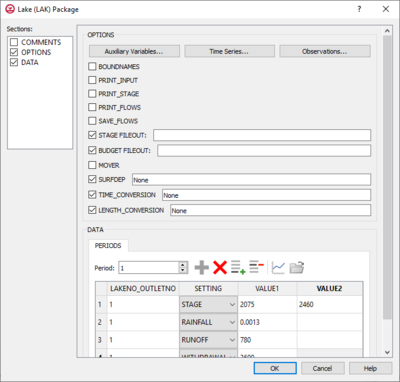
[[File: | ===Lake (LAK) Package=== | ||
[[File:MF6-LAK package.png|thumb|400px|right|The ''Lake (LAK) Package'' dialog]] | |||
The 'Lake (LAK) Package'' dialog is accessed by double-clicking on the WEL package under a MODFLOW 6 simulation in the Project Explorer. It contains the following sections and options: | |||
*''Sections'' list – A list of sections that can be turned on or off: | |||
**''Comments'' – Turn on to make the ''Comments'' section visible. | |||
**''Options'' – Turn on to make the ''Options'' section visible. | |||
**''Data'' – Turn on to make the ''Data'' section visible. This section is on by default. | |||
*''Comments'' section – Enter general alphanumeric comments. Comments entered here get written at the top of the file, preceded by a '#' symbol. | |||
*''Options'' section – Temporal options and settings: | |||
**'''Auxiliary Variables...''' – Click to bring up the [[#Auxiliary Variables Dialog|''Auxiliary Variables'' dialog]]. | |||
**'''Time Series...''' – Click to bring up the [[#Time Series Files Dialog|''Time Series Files'' dialog]]. | |||
**'''Observations...''' – Click to bring up the [[#Observation Files Dialog|''Observation Files'' dialog]]. | |||
*''Options'' section – Temporal options and settings: | |||
**''BOUNDNAMES'' – If turned on, indicates that the list of lake cells will be provided with the associative boundary names. | |||
**''PRINT_INPUT'' – If turned on, indicates that the list of lake information will be written to the listing file after it is read. | |||
**''PRINT_STAGE'' – If turned on, indicates that lake stages will be printed to the listing file for each stress period if "HEAD PRINT" is specified. | |||
**''PRINT_FLOWS'' – If turned on, indicates that a list of lake flow rates will be printed to the listing file. | |||
**''SAVE_FLOWS'' – If turned on, indicates that the lake flow terms will be written to a specified file. | |||
**''STAGE FILEOUT'' – Indicates that the record corresponds to a specific stage. Also allows the written indication of stage information. | |||
**''BUDGET FILEOUT'' – Allows the specification of a file to which desired flow terms will be written. | |||
**''NO_WELL_STORAGE'' – If turned on, indicates that well storage will not be included in the continuity equation. It is used to control discharge rate oscillations. | |||
**''SUPERFDEP'' – When turned on, allows the a written value that defines the surface depression depth of the lake. | |||
**''MOVER'' – When turned on, indicates that the Lake (Lak) Package, in this instance can be used in collaboration with the Water Mover (MVR) Package. | |||
**''TIME_CONVERSION'' – Value that is used in converting outlet flow terms into time units. | |||
**''LENGTH_CONVERSION'' – Value that is used in converting outlet flow terms into length units. | |||
*''Data'' section – Contains the following: | |||
**''Periods'' drop-down – Use the '''Increment Up and Down''' [[File:Increment up and down arrows.png|14px]] buttons to select the desired period. | |||
**'''Define Period''' [[File:Add Note Icon.svg|14px]] – If no period is defined, click to make the spreadsheet editable. | |||
**'''Delete Period''' [[File:GMS Delete Icon.svg|14px]] – Click to delete the existing period. | |||
**'''Add Rows''' [[File:Row-add.svg|14px]] – Click to bring up the [[#Add Stresses Dialog|''Add Stresses'' dialog]]. | |||
**'''Delete Rows''' [[File:Row-delete.svg|14px]] – Click to bring up a dialog with three options: | |||
***'''Delete from All Periods''' – Click to delete matching stresses from all periods. | |||
***'''Delete from Just This Period''' – Click to delete matching stresses from just this period. | |||
**'''Plot All Periods''' [[File:Mf6time-series.svg|14px]] – Click to bring up the [[GMS:XY Series Editor|''XY Series Editor'' dialog]]. Requires that a cell be selected in the table. | |||
**'''Open Time Series''' [[File:Open Macro.svg|14px]] – Click to bring up the | |||
**'''Filter on Selected Cells''' [[File:Mf6filter.svg|14px]] – Click to turn on filtering on the selected cells. | |||
*''Table'' – Allows the manual input of different variables for the MAW Package. | |||
**'''AKENO_OTLETNO''' – A value that defines the reach number associated with the specified PERIOD data. | |||
**'''SETTING''' – Information that is linked to keywords and values. | |||
**'''VALUE1''' – Value to be entered in relation to the specific project. | |||
**'''VALUE2''' – Value to be entered in relation to the specific project. | |||
{{-}} | {{-}} | ||
===MAW=== | |||
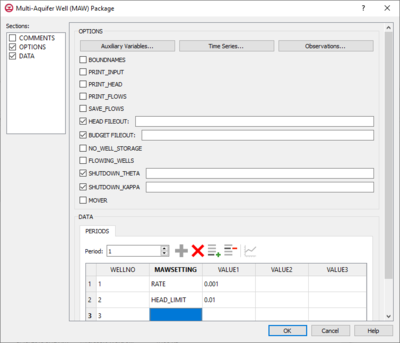
[[File: | ===Multi-Aquifer Well (MAW) Package=== | ||
[[File:MF6-MAW Package.png|thumb|400px|right|The ''Multi-Aquifer Well (MAW) Package'' dialog]] | |||
The ''Multi-Aquifer Well (MAW) Package'' dialog is accessed by double-clicking on the WEL package under a MODFLOW 6 simulation in the Project Explorer. It contains the following sections and options: | |||
*''Sections'' list – A list of sections that can be turned on or off: | |||
**''Comments'' – Turn on to make the ''Comments'' section visible. | |||
**''Options'' – Turn on to make the ''Options'' section visible. | |||
**''Data'' – Turn on to make the ''Data'' section visible. This section is on by default. | |||
*''Comments'' section – Enter general alphanumeric comments. Comments entered here get written at the top of the file, preceded by a '#' symbol. | |||
*''Options'' section – Temporal options and settings: | |||
**'''Auxiliary Variables...''' – Click to bring up the [[#Auxiliary Variables Dialog|''Auxiliary Variables'' dialog]]. | |||
**'''Time Series...''' – Click to bring up the [[#Time Series Files Dialog|''Time Series Files'' dialog]]. | |||
**'''Observations...''' – Click to bring up the [[#Observation Files Dialog|''Observation Files'' dialog]]. | |||
*''Options'' section – Temporal options and settings: | |||
**''BOUNDNAMES'' – If turned on, indicates that the list of multi-aquifer well cells will be provided with the associative boundary names. | |||
**''PRINT_INPUT'' – If turned on, indicates that the list of multi-aquifer well information will be written to the listing file after it is read. | |||
**''PRINT_HEAD'' – If turned on, indicates that well heads will be printed to the listing file for each stress period that "HEAD PRINT" is specified. | |||
**''PRINT_FLOWS'' – If turned on, indicates that a list of multi-aquifer well flow rates will be printed to the listing file. | |||
**''SAVE_FLOWS'' – If turned on, indicates that the multi-aquifer well flow terms will be written to a specified file. | |||
**''HEAD FILEOUT'' – The name of the output file to write stage information. | |||
**''BUDGET FILEOUT'' – Allows the specification of a file to which desired flow terms will be written. | |||
**''NO_WELL_STORAGE'' – If turned on, indicates that well storage will not be included in the continuity equation. It is used to control discharge rate oscillations. | |||
**''FLOWING_WELLS'' – If turned on, indicates that the flowing wells option is activated. | |||
**''SHUTDOWN_THETA'' – Defines the weight that is applied to the discharge rate for wells that have water limitations. | |||
**''SHUTDOWN_KAPPA'' – Defines the weight that is applied to the discharge rate for wells that have water limitations. It is used to control discharge rate oscillations. | |||
**''MOVER'' – When turned on, indicates that the Unsaturated Zone Flow (SFR) Package, in this instance can be used in collaboration with the Water Mover (MVR) Package. | |||
*''Data'' section – Contains the following: | |||
**''Periods'' drop-down – Use the '''Increment Up and Down''' [[File:Increment up and down arrows.png|14px]] buttons to select the desired period. | |||
**'''Define Period''' [[File:Add Note Icon.svg|14px]] – If no period is defined, click to make the spreadsheet editable. | |||
**'''Delete Period''' [[File:GMS Delete Icon.svg|14px]] – Click to delete the existing period. | |||
**'''Add Rows''' [[File:Row-add.svg|14px]] – Click to bring up the [[#Add Stresses Dialog|''Add Stresses'' dialog]]. | |||
**'''Delete Rows''' [[File:Row-delete.svg|14px]] – Click to bring up a dialog with three options: | |||
***'''Delete from All Periods''' – Click to delete matching stresses from all periods. | |||
***'''Delete from Just This Period''' – Click to delete matching stresses from just this period. | |||
**'''Plot All Periods''' [[File:Mf6time-series.svg|14px]] – Click to bring up the [[GMS:XY Series Editor|''XY Series Editor'' dialog]]. Requires that a cell be selected in the table. | |||
**'''Open Time Series''' [[File:Open Macro.svg|14px]] – Click to bring up the | |||
**'''Filter on Selected Cells''' [[File:Mf6filter.svg|14px]] – Click to turn on filtering on the selected cells. | |||
*''Table'' – Allows the manual input of different variables for the MAW Package. | |||
**'''WELLNO''' – A value that defines the reach number associated with the specified PERIOD data. | |||
**'''MAWSETTING''' – Information that is linked to keywords and values. | |||
**'''VALUE1''' – Value to be entered in relation to the specific project. | |||
**'''VALUE2''' – Value to be entered in relation to the specific project. | |||
**'''VALUE3''' – Value to be entered in relation to the specific project. | |||
{{-}} | {{-}} | ||
===MVR=== | |||
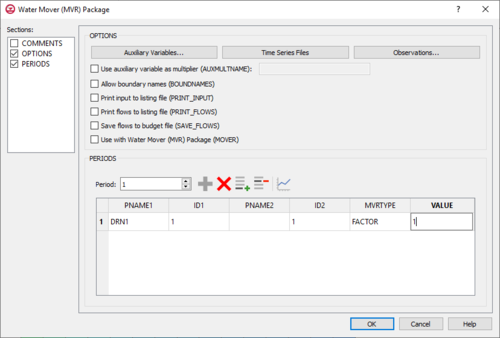
[[File: | ===Water Mover (MVR) Package=== | ||
[[File:MF6-MVR package.png|thumb|500px|right|The ''Water Mover (MVR) Package'' dialog]] | |||
The ''Water Mover (MVR) Package'' dialog is accessed by double-clicking on the MVR package under a MODFLOW 6 simulation in the Project Explorer. It contains the following sections and options: | |||
*''Sections'' list – A list of sections that can be turned on or off: | |||
**''Comments'' – Turn on to make the ''Comments'' section visible. | |||
**''Options'' – Turn on to make the ''Options'' section visible. | |||
**''Periods'' – Turn on to make the ''Periods'' section visible. | |||
*''Comments'' section – Enter general alphanumeric comments. Comments entered here get written at the top of the file, preceded by a '#' symbol. | |||
*''Options'' section – Temporal options and settings: | |||
**'''Auxiliary Variables...''' – Click to bring up the [[#Auxiliary Variables Dialog|''Auxiliary Variables'' dialog]]. | |||
**'''Time Series...''' – Click to bring up the [[#Time Series Files Dialog|''Time Series Files'' dialog]]. | |||
**'''Observations...''' – Click to bring up the [[#Observation Files Dialog|''Observation Files'' dialog]]. | |||
**''Use auxiliary variable as multiplier (AUXMULTNAME)'' – Name of auxiliary variable to be used as multiplier o MVR conductance. | |||
**''Allow boundary names (BOUNDNAMES)'' – Turn on to allow boundary names to be included in the list of MVR cells. | |||
**''Print input to listing file (PRINT_INPUT)'' – Turn on to write the list of MVR information to the listing file immediately after it is read. | |||
**''Print flows to listing file (PRINT_FLOWS)'' – Turn on to write the list of MVR flow rates to the listing file for every stress period time step in which "BUDGET PRINT" is specified in [[GMS:MF6 OC Package|Output Control]]. | |||
**''Save flows to budget file (SAVE_FLOWS)'' – Turn on to write MVR flow terms to the file specified with "BUDGET FILEOUT" in [[GMS:MF6 OC Package|Output Control]]. | |||
**''Use with Water Mover (MVR) package (MOVER)'' – Turn on to allows this instance of the Water Mover Package to be used with the Water Mover (MVR) Package. | |||
*''Periods'' section – Contains the following: | |||
**''Period'' drop-down – Use the '''Increment Up and Down''' [[File:Increment up and down arrows.png|14px]] buttons to select the desired period. | |||
**'''Define Period''' [[File:Add Note Icon.svg|14px]] – If no period is defined, click to make the spreadsheet editable. | |||
**'''Delete Period''' [[File:GMS Delete Icon.svg|14px]] – Click to delete the existing period. | |||
**'''Add Rows''' [[File:Row-add.svg|14px]] – Click to bring up the GMS dialog and input values into the layer, row, column, and Q table found in the Periods section. | |||
**'''Delete Rows''' [[File:Row-delete.svg|14px]] – Click to bring up a dialog with three options: | |||
***'''Delete from All Periods''' – Click to delete matching stresses from all periods. | |||
***'''Delete from Just This Period''' – Click to delete matching stresses from just this period. | |||
**'''Plot All Periods''' [[File:Mf6time-series.svg|14px]] – Click to bring up the [[GMS:XY Series Editor|''XY Series Editor'' dialog]]. Requires that a cell be selected in the table. | |||
**'''Open Time Series''' [[File:Open Macro.svg|14px]] – Click to bring up the | |||
**'''Filter on Selected Cells''' [[File:Mf6filter.svg|14px]] – Click to turn on filtering on the selected cells. | |||
***Table – Options include: | |||
****''PNAME1'' – The name of a package that may be included in a subsequent stress period block. | |||
****''ID1'' – Identifies the provider. | |||
****''PNAME2'' – Represents the package name for the receiver. | |||
****''ID2'' – The identifier for the receiver. | |||
****''MVRTYPE'' – Is the character that represents the method for determining how much water will be moved. | |||
****''VALUE'' – Is used in an equation to determine how much water will be moved. | |||
{{-}} | {{-}} | ||
===OBS=== | |||
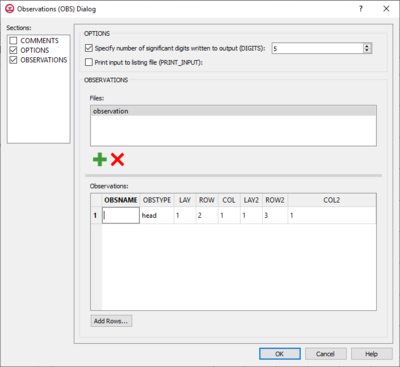
[[File: | ===Observations (OBS) Utility=== | ||
[[File:MF6-OBS dialog.png|thumb|400px|right|The ''Observations (OBS) Dialog'']] | |||
The ''Observations (OBS) Package'' dialog is accessed by double-clicking on the OBS package under a MODFLOW 6 simulation in the Project Explorer. It contains the following sections and options: | |||
*''Sections'' list – A list of sections that can be turned on or off: | |||
**''Comments'' – Turn on to make the ''Comments'' section visible. | |||
**''Options'' – Turn on to make the ''Options'' section visible. | |||
**''Observations'' – Turn on to make the ''Observations'' section visible. | |||
*''Options'' section contains the following: | |||
**''Specify number of significant digits written to output (DIGITS)'' – | |||
**''Print input to listing file (PRINT_INPUT)'' – Indicates that the list of information will be written to the listing file immediately after it is read. | |||
*''Observations'' section – Allows the entering of specific files into the given text box. | |||
**'''Add File''' [[File:Add Note Icon.svg|14px]] – Click to edit and add a file. | |||
**'''Delete File''' [[File:GMS Delete Icon.svg|14px]] – Click to delete the existing file. | |||
***Observations table: – Enables the entering of observation information when a new file has been added. | |||
****''OBSNAME'' – Name of the observation. | |||
****''OBSTYPE'' – Type of the observation file being used. | |||
****''LAY1'' – Identifier for the first layer. | |||
****''ROW1'' – Identifier for the first row. | |||
****''COL1'' – Identifier for the first column. | |||
****''LAY2'' – Identifier for the second layer. | |||
****''ROW2'' – Identifier for the second row. | |||
****''COL2'' – Identifier for the second column. | |||
***'''Add Rows...''' – Allows the inserting of additional rows into the Observations table. | |||
{{-}} | {{-}} | ||
===OC=== | |||
===Output Control (OC) Package=== | |||
[[File:MF6-OutputControl dialog.png|thumb|500px|right|The ''Output Control (OC) Dialog'']] | [[File:MF6-OutputControl dialog.png|thumb|500px|right|The ''Output Control (OC) Dialog'']] | ||
The ''Output Control (OC) Package'' dialog is accessed by double-clicking on the OC package under a MODFLOW 6 simulation in the Project Explorer. It contains the following sections and options: | |||
*''Sections'' list – A list of sections that can be turned on or off: | |||
**''Comments'' – Turn on to make the ''Comments'' section visible. | |||
**''Options'' – Turn on to make the ''Options'' section visible. | |||
**''Periods'' – Turn on to make the ''Periods'' section visible. This section is on by default. | |||
*''Comments'' section – Enter general alphanumeric comments. Comments entered here get written at the top of the file, preceded by a '#' symbol. | |||
*''Options'' section contains the following: | |||
**''BUDGET FILEOUT:'' – Allows the specification of a file to which desired flow terms will be written. | |||
**''HEAD FILEOUT:'' – Output file to write head information. | |||
**''HEAD PRINT_FORMAT:'' – When turned on, allows you to specify the format to print to the listing file. Options include: | |||
***''GENERAL'' – Prints in the general format to the listing file | |||
***''EXPONENTIAL'' – Prints in exponential format to the listing file. | |||
***''FIXED'' – Prints in a fixed format to the listing file. | |||
***''SCIENTIFIC'' – Prints in a scientific format to the listing file. | |||
****''COLUMNS'' – The number of columns for writing data. | |||
****''WIDTH'' – The width used to write each number | |||
****''DIGITS'' – The number of digits used for writing each number. | |||
*''Periods'' section – Contains the following: | |||
**'''Add Rows''' [[File:Row-add.svg|14px]] – Click to bring up the GMS dialog and input values into the layer, row, column, and Q table found in the Periods section. | |||
**''Preset output'' – Allows choosing which time periods you wish to output information. Options include: | |||
***''At every time step'' – Output information at every time step. | |||
***''At last time step of each stress period'' – Output information at the last time step of each stress period. | |||
***''User specified'' – Allows user to choose the output settings manually which are entered into a given table. | |||
****''Table'' – Contains the following options: | |||
*****'''PERIOD''' – Indicates for which PERIOD the information will be saved. | |||
*****'''PRINT/SAVE''' – Indicates which stress period the information will be printed or saved on. | |||
*****'''RTYPE''' – This is the type of information (BUDGET/HEAD) to save or print. | |||
*****'''OCSETTING''' – Indicates which steps the data will be saved for. | |||
*****'''FREQUENCY/STEPS''' – Indicates which time step frequency or STEPS for which information will be saved. | |||
{{-}} | {{-}} | ||
| Line 318: | Line 607: | ||
**''Periods'' – Turn on to make the ''Periods'' section visible. This section is on by default. | **''Periods'' – Turn on to make the ''Periods'' section visible. This section is on by default. | ||
*''Comments'' section – Enter general alphanumeric comments. Comments entered here get written at the top of the file, preceded by a '#' symbol. | *''Comments'' section – Enter general alphanumeric comments. Comments entered here get written at the top of the file, preceded by a '#' symbol. | ||
*''Options'' section | *''Options'' section – Temporal options and settings: | ||
**'''Auxiliary Variables...''' – Click to bring up the [[#Auxiliary Variables Dialog|''Auxiliary Variables'' dialog]]. | **'''Auxiliary Variables...''' – Click to bring up the [[#Auxiliary Variables Dialog|''Auxiliary Variables'' dialog]]. | ||
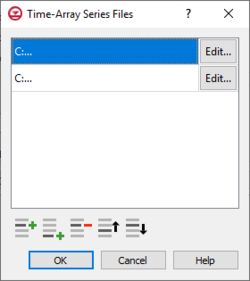
**'''Time-Array Series Files''' – Click to bring up the [[#Time-Array Series Files Dialog|''Time-Array Series Files'' dialog]]. | **'''Time-Array Series Files''' – Click to bring up the [[#Time-Array Series Files Dialog|''Time-Array Series Files'' dialog]]. | ||
| Line 324: | Line 613: | ||
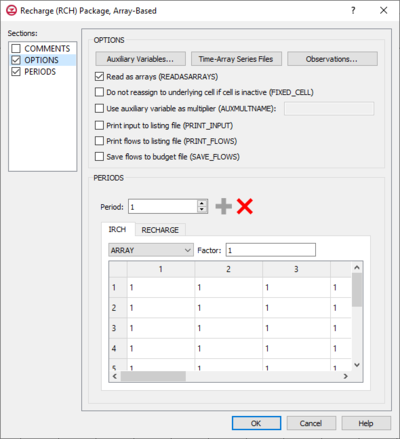
**''Read as arrays (READASARRAYS) – Click to specify to use array-based input in the RCH package. | **''Read as arrays (READASARRAYS) – Click to specify to use array-based input in the RCH package. | ||
**''Do not reassign to underlying cell if cell is inactive (FIXED_CELL)'' – Click to indicate that recharge will not be reassigned to a cell underlying the cell specified in the list if the specified cell is inactive. | **''Do not reassign to underlying cell if cell is inactive (FIXED_CELL)'' – Click to indicate that recharge will not be reassigned to a cell underlying the cell specified in the list if the specified cell is inactive. | ||
**''Use auxiliary variable as multiplier (AUXMULTNAME)'' – Name of auxiliary variable to be used as multiplier of | **''Use auxiliary variable as multiplier (AUXMULTNAME)'' – Name of auxiliary variable to be used as multiplier of recharge. | ||
**''Print input to listing file (PRINT_INPUT)'' – Turn on to write the list of | **''Print input to listing file (PRINT_INPUT)'' – Turn on to write the list of recharge information to the listing file immediately after it is read. | ||
**''Print flows to listing file (PRINT_FLOWS)'' – Turn on to write the list of | **''Print flows to listing file (PRINT_FLOWS)'' – Turn on to write the list of recharge flow rates to the listing file for every stress period time step in which "BUDGET PRINT" is specified in [[GMS:MF6 OC Package|Output Control]]. | ||
**''Save flows to budget file (SAVE_FLOWS)'' – Turn on to write | **''Save flows to budget file (SAVE_FLOWS)'' – Turn on to write recharge flow terms to the file specified with "BUDGET FILEOUT" in [[GMS:MF6 OC Package|Output Control]]. | ||
*''Periods'' section – Contains the following: | *''Periods'' section – Contains the following: | ||
**''Period'' drop-down – Use the '''Increment Up and Down''' [[File:Increment up and down arrows.png|14px]] buttons to select the desired period. | **''Period'' drop-down – Use the '''Increment Up and Down''' [[File:Increment up and down arrows.png|14px]] buttons to select the desired period. | ||
| Line 358: | Line 647: | ||
**'''Time Series...''' – Click to bring up the [[#Time Series Files Dialog|''Time Series Files'' dialog]]. | **'''Time Series...''' – Click to bring up the [[#Time Series Files Dialog|''Time Series Files'' dialog]]. | ||
**'''Observations...''' – Click to bring up the [[#Observation Files Dialog|''Observation Files'' dialog]]. | **'''Observations...''' – Click to bring up the [[#Observation Files Dialog|''Observation Files'' dialog]]. | ||
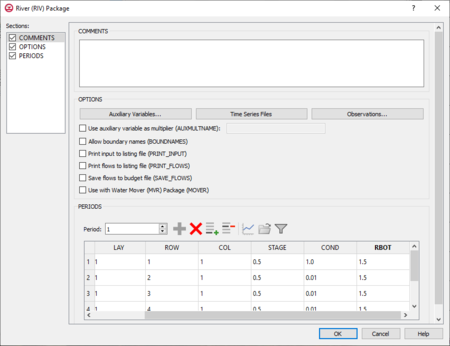
**''Use auxiliary variable as multiplier (AUXMULTNAME)'' – Name of auxiliary variable to be used as multiplier of | **''Use auxiliary variable as multiplier (AUXMULTNAME)'' – Name of auxiliary variable to be used as multiplier of riverbed conductance. | ||
**''Allow boundary names (BOUNDNAMES)'' – Turn on to allow boundary names to be included in the list of | **''Allow boundary names (BOUNDNAMES)'' – Turn on to allow boundary names to be included in the list of river cells. | ||
**''Print input to listing file (PRINT_INPUT)'' – Turn on to write the list of | **''Print input to listing file (PRINT_INPUT)'' – Turn on to write the list of river information to the listing file immediately after it is read. | ||
**''Print flows to listing file (PRINT_FLOWS)'' – Turn on to write the list of | **''Print flows to listing file (PRINT_FLOWS)'' – Turn on to write the list of river flow rates to the listing file for every stress period time step in which "BUDGET PRINT" is specified in [[GMS:MF6 OC Package|Output Control]]. | ||
**''Save flows to budget file (SAVE_FLOWS)'' – Turn on to write | **''Save flows to budget file (SAVE_FLOWS)'' – Turn on to write river flow terms to the file specified with "BUDGET FILEOUT" in [[GMS:MF6 OC Package|Output Control]]. | ||
**''Use with Water Mover (MVR) package (MOVER)'' – Turn on to allows this instance of the | **''Use with Water Mover (MVR) package (MOVER)'' – Turn on to allows this instance of the River Package to be used with the Water Mover (MVR) Package. | ||
*''Periods'' section – Contains the following: | *''Periods'' section – Contains the following: | ||
**''Period'' drop-down – Use the '''Increment Up and Down''' [[File:Increment up and down arrows.png|14px]] buttons to select the desired period. | **''Period'' drop-down – Use the '''Increment Up and Down''' [[File:Increment up and down arrows.png|14px]] buttons to select the desired period. | ||
**'''Define Period''' [[File:Add Note Icon.svg|14px]] – If no period is defined, click to make the spreadsheet editable. | **'''Define Period''' [[File:Add Note Icon.svg|14px]] – If no period is defined, click to make the spreadsheet editable. | ||
**'''Delete Period''' [[File:GMS Delete Icon.svg|14px]] – Click to delete the existing period. | **'''Delete Period''' [[File:GMS Delete Icon.svg|14px]] – Click to delete the existing period. | ||
**'''Add Rows''' [[File: | **'''Add Rows''' [[File:Row-add.svg|14px]] – Click to bring up the GMS dialog and input values into the layer, row, column, and Q table found in the Periods section. | ||
**'''Delete Rows''' [[File: | **'''Delete Rows''' [[File:Row-delete.svg|14px]] – Click to bring up a dialog with three options: | ||
***'''Delete from All Periods''' – Click to delete matching stresses from all periods. | ***'''Delete from All Periods''' – Click to delete matching stresses from all periods. | ||
***'''Delete from Just This Period''' – Click to delete matching stresses from just this period. | ***'''Delete from Just This Period''' – Click to delete matching stresses from just this period. | ||
**'''Plot All Periods''' [[File:Mf6time-series.svg|14px]] – Click to bring up the [[GMS:XY Series Editor|''XY Series Editor'' dialog]]. Requires that a cell be selected in the table. | |||
**'''Plot All Periods''' [[File: | |||
**'''Open Time Series''' [[File:Open Macro.svg|14px]] – Click to bring up the | **'''Open Time Series''' [[File:Open Macro.svg|14px]] – Click to bring up the | ||
**'''Filter on Selected Cells''' [[File: | **'''Filter on Selected Cells''' [[File:Mf6filter.svg|14px]] – Click to turn on filtering on the selected cells. | ||
*''Table'' – | *''Table'' – Options include: | ||
**'''LAY''' – Represents which layer within the module to which the chosen well will be assigned. | **'''LAY''' – Represents which layer within the module to which the chosen well will be assigned. | ||
**'''ROW''' – Represents which row within the module to which the chosen well will be assigned. | **'''ROW''' – Represents which row within the module to which the chosen well will be assigned. | ||
| Line 387: | Line 675: | ||
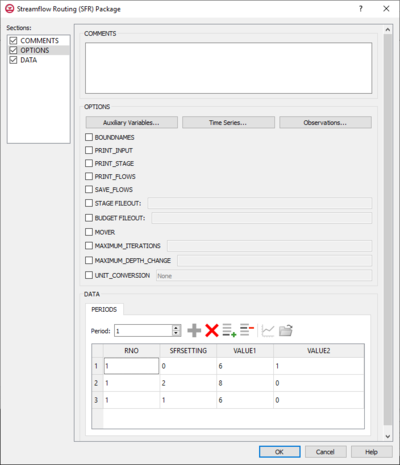
===Streamflow Routing (SFR) Package=== | ===Streamflow Routing (SFR) Package=== | ||
[[File:MF6-SFR package.png|thumb|400px|right|The ''Streamflow Routing (SFR) Package'' dialog]] | [[File:MF6-SFR package.png|thumb|400px|right|The ''Streamflow Routing (SFR) Package'' dialog]] | ||
The ''Streamflow Routing (SFR) Package'' dialog is accessed by double-clicking on the | The ''Streamflow Routing (SFR) Package'' dialog is accessed by double-clicking on the SFR package under a MODFLOW 6 simulation in the Project Explorer. It contains the following sections and options: | ||
*''Sections'' list – A list of sections that can be turned on or off: | *''Sections'' list – A list of sections that can be turned on or off: | ||
**''Comments'' – Turn on to make the ''Comments'' section visible. | **''Comments'' – Turn on to make the ''Comments'' section visible. | ||
| Line 398: | Line 686: | ||
**'''Observations...''' – Click to bring up the [[#Observation Files Dialog|''Observation Files'' dialog]]. | **'''Observations...''' – Click to bring up the [[#Observation Files Dialog|''Observation Files'' dialog]]. | ||
*''Options'' section – Temporal options and settings: | *''Options'' section – Temporal options and settings: | ||
**''BOUNDNAMES'' – If turned on, indicates that the list of | **''BOUNDNAMES'' – If turned on, indicates that the list of streamflow routing cells will be provided with the associative boundary names. | ||
**''PRINT_INPUT'' – If turned on, indicates that the list of | **''PRINT_INPUT'' – If turned on, indicates that the list of streamflow routing information will be written to the listing file after it is read. | ||
**''PRINT_FLOWS'' – If turned on, indicates that a list of | **''PRINT_FLOWS'' – If turned on, indicates that a list of streamflow routing flow rates will be printed to the listing file. | ||
**''SAVE_FLOWS'' – If turned on, indicates that the | **''SAVE_FLOWS'' – If turned on, indicates that the streamflow routing flow terms will be written to a specified file. | ||
**''STAGE FILEOUT'' – Indicates that the record corresponds to a specific stage. Also allows the written indication of stage information. | **''STAGE FILEOUT'' – Indicates that the record corresponds to a specific stage. Also allows the written indication of stage information. | ||
**''BUDGET FILEOUT'' – Allows the specification of a file to which desired flow terms will be written. | **''BUDGET FILEOUT'' – Allows the specification of a file to which desired flow terms will be written. | ||
**''MOVER'' – When turned on, indicates that the | **''MOVER'' – When turned on, indicates that the Streamflow Routing (SFR) Package, in this instance can be used in collaboration with the Water Mover (MVR) Package. | ||
**''MAXIMUM_ITERATIONS'' – Allows the written indication of the maximum number of Streamflow Routing NewtonRaphson iterations allowed for a reach. | **''MAXIMUM_ITERATIONS'' – Allows the written indication of the maximum number of Streamflow Routing NewtonRaphson iterations allowed for a reach. | ||
**''MAXIMUM_DEPTH_CHANGE'' – Allows the written indication of the depth closure tolerance. | **''MAXIMUM_DEPTH_CHANGE'' – Allows the written indication of the depth closure tolerance. | ||
| Line 412: | Line 700: | ||
**'''Define Period''' [[File:Add Note Icon.svg|14px]] – If no period is defined, click to make the spreadsheet editable. | **'''Define Period''' [[File:Add Note Icon.svg|14px]] – If no period is defined, click to make the spreadsheet editable. | ||
**'''Delete Period''' [[File:GMS Delete Icon.svg|14px]] – Click to delete the existing period. | **'''Delete Period''' [[File:GMS Delete Icon.svg|14px]] – Click to delete the existing period. | ||
**'''Add Rows''' [[File: | **'''Add Rows''' [[File:Row-add.svg|14px]] – Click to bring up the [[#Add Stresses Dialog|''Add Stresses'' dialog]]. | ||
**'''Delete Rows''' [[File: | **'''Delete Rows''' [[File:Row-delete.svg|14px]] – Click to bring up a dialog with three options: | ||
***'''Delete from All Periods''' – Click to delete matching stresses from all periods. | ***'''Delete from All Periods''' – Click to delete matching stresses from all periods. | ||
***'''Delete from Just This Period''' – Click to delete matching stresses from just this period. | ***'''Delete from Just This Period''' – Click to delete matching stresses from just this period. | ||
**'''Plot All Periods''' [[File:Mf6time-series.svg|14px]] – Click to bring up the [[GMS:XY Series Editor|''XY Series Editor'' dialog]]. Requires that a cell be selected in the table. | |||
**'''Plot All Periods''' [[File: | |||
**'''Open Time Series''' [[File:Open Macro.svg|14px]] – Click to bring up the | **'''Open Time Series''' [[File:Open Macro.svg|14px]] – Click to bring up the | ||
**'''Filter on Selected Cells''' [[File: | **'''Filter on Selected Cells''' [[File:Mf6filter.svg|14px]] – Click to turn on filtering on the selected cells. | ||
*''Table'' – Allows the manual input of different variables for the SFR Package. | *''Table'' – Allows the manual input of different variables for the SFR Package. | ||
**'''RNO''' – A value that defines the reach number associated with the specified PERIOD data. | **'''RNO''' – A value that defines the reach number associated with the specified PERIOD data. | ||
**'''SFRSETTING''' – Information that is linked to keywords and values. | **'''SFRSETTING''' – Information that is linked to keywords and values. | ||
**'''VALUE1''' – | **'''VALUE1''' – Value to be entered in relation to the specific project. | ||
**'''VALUE2''' – | **'''VALUE2''' – Value to be entered in relation to the specific project. | ||
{{-}} | {{-}} | ||
| Line 436: | Line 723: | ||
**''GridData'' – Turn on to make the ''GridData'' section visible. This section is on by default. | **''GridData'' – Turn on to make the ''GridData'' section visible. This section is on by default. | ||
*''Comments'' section – Enter general alphanumeric comments. Comments entered here get written at the top of the file, preceded by a '#' symbol. | *''Comments'' section – Enter general alphanumeric comments. Comments entered here get written at the top of the file, preceded by a '#' symbol. | ||
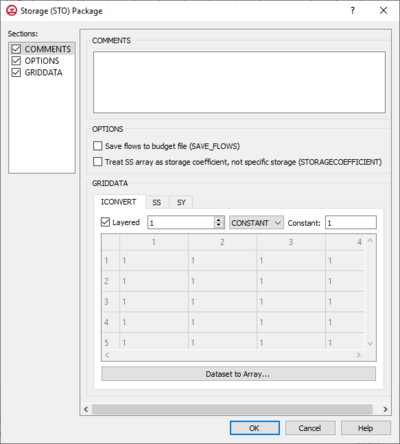
*''Options'' section | *''Options'' section – Contains the following: | ||
**''Save flows to budget file (SAVE_FLOWS)'' – Turn on to write cell-by-cell flow terms to the file specified with "BUDGET SAVE FILE" in [[GMS: | **''Save flows to budget file (SAVE_FLOWS)'' – Turn on to write cell-by-cell flow terms to the file specified with "BUDGET SAVE FILE" in [[GMS:MF6 OC Package|Output Control]]. | ||
**''Treat SS array as storage coefficient, not specific storage (STORAGECOEFFICIENT)'' – Indicates that the SS array is read as storage coefficient and not as specific storage. | **''Treat SS array as storage coefficient, not specific storage (STORAGECOEFFICIENT)'' – Indicates that the SS array is read as storage coefficient and not as specific storage. | ||
*''GridData'' section – Contains a number of tabs, including: | *''GridData'' section – Contains a number of tabs, including: | ||
| Line 462: | Line 749: | ||
**'''Observations...''' – Click to bring up the [[#Observation Files Dialog|''Observation Files'' dialog]]. | **'''Observations...''' – Click to bring up the [[#Observation Files Dialog|''Observation Files'' dialog]]. | ||
**''AUXMULTNAME'' – The name of the auxiliary variable. | **''AUXMULTNAME'' – The name of the auxiliary variable. | ||
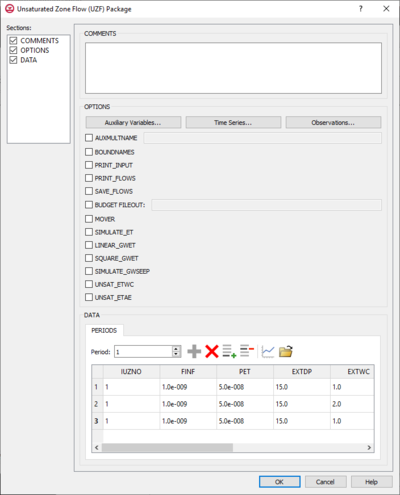
**''BOUNDNAMES'' – If turned on, indicates that the list of | **''BOUNDNAMES'' – If turned on, indicates that the list of UZF cells will be provided with the associative boundary names. | ||
**''PRINT_INPUT'' – If turned on, indicates that the list of | **''PRINT_INPUT'' – If turned on, indicates that the list of UZF information will be written to the listing file after it is read. | ||
**''PRINT_FLOWS'' – If turned on, indicates that a list of | **''PRINT_FLOWS'' – If turned on, indicates that a list of UZF flow rates will be printed to the listing file. | ||
**''SAVE_FLOWS'' – If turned on, indicates that the | **''SAVE_FLOWS'' – If turned on, indicates that the UZF flow terms will be written to a specified file. | ||
**''BUDGET FILEOUT'' – Allows the specification of a file to which desired flow terms will be written. | **''BUDGET FILEOUT'' – Allows the specification of a file to which desired flow terms will be written. | ||
**''MOVER'' – When turned on, indicates that the Unsaturated Zone Flow (UZF) Package, in this instance can be used in collaboration with the Water Mover (MVR) Package. | **''MOVER'' – When turned on, indicates that the Unsaturated Zone Flow (UZF) Package, in this instance can be used in collaboration with the Water Mover (MVR) Package. | ||
| Line 478: | Line 765: | ||
**'''Define Period''' [[File:Add Note Icon.svg|14px]] – If no period is defined, click to make the spreadsheet editable. | **'''Define Period''' [[File:Add Note Icon.svg|14px]] – If no period is defined, click to make the spreadsheet editable. | ||
**'''Delete Period''' [[File:GMS Delete Icon.svg|14px]] – Click to delete the existing period. | **'''Delete Period''' [[File:GMS Delete Icon.svg|14px]] – Click to delete the existing period. | ||
**'''Add Rows''' [[File: | **'''Add Rows''' [[File:Row-add.svg|14px]] – Click to bring up the [[#Add Stresses Dialog|''Add Stresses'' dialog]]. | ||
**'''Delete Rows''' [[File: | **'''Delete Rows''' [[File:Row-delete.svg|14px]] – Click to bring up a dialog with three options: | ||
***'''Delete from All Periods''' – Click to delete matching stresses from all periods. | ***'''Delete from All Periods''' – Click to delete matching stresses from all periods. | ||
***'''Delete from Just This Period''' – Click to delete matching stresses from just this period. | ***'''Delete from Just This Period''' – Click to delete matching stresses from just this period. | ||
**'''Plot All Periods''' [[File:Mf6time-series.svg|14px]] – Click to bring up the [[GMS:XY Series Editor|''XY Series Editor'' dialog]]. Requires that a cell be selected in the table. | |||
**'''Plot All Periods''' [[File: | |||
**'''Open Time Series''' [[File:Open Macro.svg|14px]] – Click to bring up the | **'''Open Time Series''' [[File:Open Macro.svg|14px]] – Click to bring up the | ||
**'''Filter on Selected Cells''' [[File: | **'''Filter on Selected Cells''' [[File:Mf6filter.svg|14px]] – Click to turn on filtering on the selected cells. | ||
*''Table'' – Allows the manual input of different variables for the UZF Package. | *''Table'' – Allows the manual input of different variables for the UZF Package. | ||
**'''IUZNO''' – An integer value that defines the UZF cell number associated with the specified PERIOD data on the line. | **'''IUZNO''' – An integer value that defines the UZF cell number associated with the specified PERIOD data on the line. | ||
| Line 510: | Line 796: | ||
**'''Time Series...''' – Click to bring up the [[#Time Series Files Dialog|''Time Series Files'' dialog]]. | **'''Time Series...''' – Click to bring up the [[#Time Series Files Dialog|''Time Series Files'' dialog]]. | ||
**'''Observations...''' – Click to bring up the [[#Observation Files Dialog|''Observation Files'' dialog]]. | **'''Observations...''' – Click to bring up the [[#Observation Files Dialog|''Observation Files'' dialog]]. | ||
**''Use auxiliary variable as multiplier (AUXMULTNAME)'' – Name of auxiliary variable to be used as multiplier of | **''Use auxiliary variable as multiplier (AUXMULTNAME)'' – Name of auxiliary variable to be used as multiplier of well flow rate. | ||
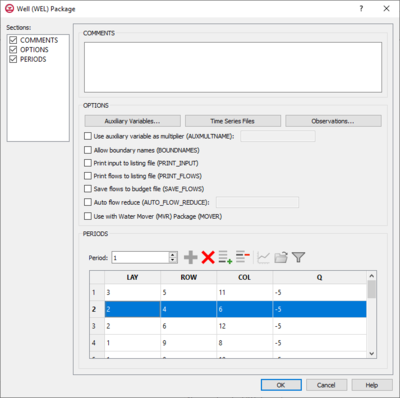
**''Allow boundary names (BOUNDNAMES)'' – Turn on to allow boundary names to be included in the list of | **''Allow boundary names (BOUNDNAMES)'' – Turn on to allow boundary names to be included in the list of well cells. | ||
**''Print input to listing file (PRINT_INPUT)'' – Turn on to write the list of | **''Print input to listing file (PRINT_INPUT)'' – Turn on to write the list of well information to the listing file immediately after it is read. | ||
**''Print flows to listing file (PRINT_FLOWS)'' – Turn on to write the list of | **''Print flows to listing file (PRINT_FLOWS)'' – Turn on to write the list of well flow rates to the listing file for every stress period time step in which "BUDGET PRINT" is specified in [[GMS:MF6 OC Package|Output Control]]. | ||
**''Save flows to budget file (SAVE_FLOWS)'' – Turn on to write | **''Save flows to budget file (SAVE_FLOWS)'' – Turn on to write well flow terms to the file specified with "BUDGET FILEOUT" in [[GMS:MF6 OC Package|Output Control]]. | ||
**''Use with Water Mover (MVR) package (MOVER)'' – Turn on to allows this instance of the | **''Use with Water Mover (MVR) package (MOVER)'' – Turn on to allows this instance of the Well Package to be used with the Water Mover (MVR) Package. | ||
*''Periods'' section – Contains the following: | *''Periods'' section – Contains the following: | ||
**''Period'' drop-down – Use the '''Increment Up and Down''' [[File:Increment up and down arrows.png|14px]] buttons to select the desired period. | **''Period'' drop-down – Use the '''Increment Up and Down''' [[File:Increment up and down arrows.png|14px]] buttons to select the desired period. | ||
**'''Define Period''' [[File:Add Note Icon.svg|14px]] – If no period is defined, click to make the spreadsheet editable. | **'''Define Period''' [[File:Add Note Icon.svg|14px]] – If no period is defined, click to make the spreadsheet editable. | ||
**'''Delete Period''' [[File:GMS Delete Icon.svg|14px]] – Click to delete the existing period. | **'''Delete Period''' [[File:GMS Delete Icon.svg|14px]] – Click to delete the existing period. | ||
**'''Add Rows''' [[File: | **'''Add Rows''' [[File:Row-add.svg|14px]] – Click to bring up the GMS dialog and input values into the layer, row, column, and Q table found in the Periods section. | ||
**'''Delete Rows''' [[File: | **'''Delete Rows''' [[File:Row-delete.svg|14px]] – Click to bring up a dialog with three options: | ||
***'''Delete from All Periods''' – Click to delete matching stresses from all periods. | ***'''Delete from All Periods''' – Click to delete matching stresses from all periods. | ||
***'''Delete from Just This Period''' – Click to delete matching stresses from just this period. | ***'''Delete from Just This Period''' – Click to delete matching stresses from just this period. | ||
**'''Plot All Periods''' [[File:Mf6time-series.svg|14px]] – Click to bring up the [[GMS:XY Series Editor|''XY Series Editor'' dialog]]. Requires that a cell be selected in the table. | |||
**'''Plot All Periods''' [[File: | |||
**'''Open Time Series''' [[File:Open Macro.svg|14px]] – Click to bring up the | **'''Open Time Series''' [[File:Open Macro.svg|14px]] – Click to bring up the | ||
**'''Filter on Selected Cells''' [[File: | **'''Filter on Selected Cells''' [[File:Mf6filter.svg|14px]] – Click to turn on filtering on the selected cells. | ||
*''Table'' – Allows the manual input of the placement and rate of any wells placed within the module. | *''Table'' – Allows the manual input of the placement and rate of any wells placed within the module. | ||
**'''LAY''' – Represents which layer within the grid to which the chosen well will be assigned. | **'''LAY''' – Represents which layer within the grid to which the chosen well will be assigned. | ||
| Line 539: | Line 824: | ||
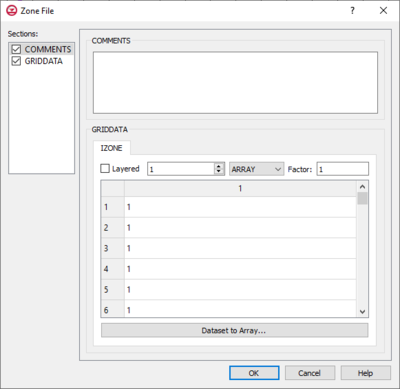
===ZONE FILE=== | ===ZONE FILE=== | ||
[[File:MF6-ZonePackage.png|thumb|400px|right|The ''Zone File'' dialog]] | [[File:MF6-ZonePackage.png|thumb|400px|right|The ''Zone File'' dialog]] | ||
The ''ZONE FILE'' dialog is accessed by double-clicking on the ZONE FILE package under a MODFLOW 6 simulation in the Project Explorer. It contains the following sections and options: | |||
**''Comments'' – Turn on to make the ''Comments'' section visible. | |||
**''GridData'' – Turn on to make the ''GridData'' section visible. This section is on by default. | |||
*''Comments'' section – Enter general alphanumeric comments. Comments entered here get written at the top of the file, preceded by a '#' symbol. | |||
*''GridData'' section – Contains one tab (IZONE): | |||
***''Layered'' – Provides an array for each layer of the grid. | |||
***If "Constant" is selected from the drop-down, enter a decimal value in the ''Constant'' field to be applied to all cells in the top model layer. | |||
***If "Array" is selected from the drop-down, a user-editable array appears below the drop-down. Enter a decimal ''Factor'' value to the right of the drop-down. The individual elements of the array are multiplied by the factor value after they are read. | |||
***'''Dataset to Array...''' – Click to open the ''Select Dataset'' dialog. Select the desired database(s) in this dialog. | |||
{{-}} | |||
==Groundwater Flow (GWF) Model Name File== | |||
[[File:MF6-GWF Model.png|thumb|400px|right|The ''Groundwater Flow (GWF) Model Name File'' dialog]] | |||
The ''Groundwater Flow (GWF) Model Name File'' dialog is accessed by double-clicking on the GWF_Model under a MODFLOW 6 simulation in the Project Explorer. It contains the following sections and options: | |||
*''Sections'' list – A list of sections that can be turned on or off: | |||
**''Comments'' – Turn on to make the ''Comments'' section visible. | |||
**''Options'' – Turn on to make the ''Options'' section visible. | |||
**''Packages'' – Turn on to make the ''Packages'' section visible. | |||
*''Comments'' section – Enter general alphanumeric comments. Comments entered here get written at the top of the file, preceded by a '#' symbol. | |||
*''Options'' section – Temporal options and settings: | |||
**''Output listing file (LIST)'' – When turned on, indicates which file is in the output listing file. | |||
**''Print all model package input to listing file (PRINT_INPUT)'' – Turn on to write the list of information to the listing file immediately after it is read. | |||
**''Save model package flows to budget file (SAVE_FLOWS)'' – Turn on to write flow terms to the file specified with "BUDGET FILEOUT" in [[GMS:MF6 OC Package|Output Control]]. | |||
**''Activate Newton-Raphson formulation for groundwater flow (NEWTON)'' – When turned on, this selection allows the utilization of the Newton-Raphson formulation as opposed to the standard used in most previous MODFLOW versions. | |||
**''Under-relax computed heads that are below cell bottom elevations (UNDER_RELAXATION)'' – When turned on, it helps define the nonlinear under-relaxation schemes used. | |||
*''Packages'' – Allows the indication of specific file and project details for the model package. | |||
**ftype – Represents the file type. | |||
**fname – Represents the file name. | |||
**pname – Represents the package's name and cannot be altered in this dialog. | |||
{{-}} | |||
==Source/Sink Dialog== | |||
[[File:MF6-Source-Sink Dialog.png|thumb|400px|right|The ''Source/Sink Dialog'']] | |||
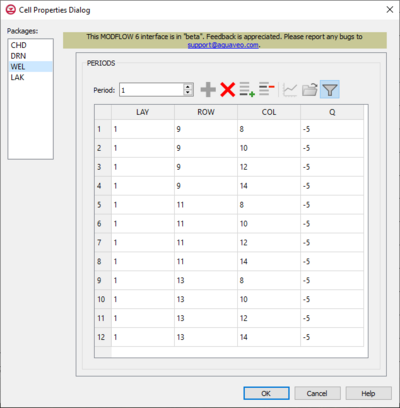
The ''Source/Sink Dialog'' is accessed by selecting a cell, right-clicking and choosing the option ''MODFLOW 6 GWF_Model- Cell Properties...'' in the right-click menu provided. | |||
*''Packages:'' section – Provides a list of active packages within the module to choose and select depending on desired outcome. | |||
*''Periods'' section – Contains the following: | |||
**''Period'' drop-down – Use the '''Increment Up and Down''' [[File:Increment up and down arrows.png|14px]] buttons to select the desired period. | |||
**'''Define Period''' [[File:Add Note Icon.svg|14px]] – If no period is defined, click to make the spreadsheet editable. | |||
**'''Delete Period''' [[File:GMS Delete Icon.svg|14px]] – Click to delete the existing period. | |||
**'''Add Rows''' [[File:Row-add.svg|14px]] – Click to bring up the [[#Add Stresses Dialog|''Add Stresses'' dialog]]. | |||
**'''Delete Rows''' [[File:Row-delete.svg|14px]] – Click to bring up a dialog with three options: | |||
***'''Delete from All Periods''' – Click to delete matching stresses from all periods. | |||
***'''Delete from Just This Period''' – Click to delete matching stresses from just this period. | |||
**'''Plot All Periods''' [[File:Mf6time-series.svg|14px]] – Click to bring up the [[GMS:XY Series Editor|''XY Series Editor'' dialog]]. Requires that a cell be selected in the table. | |||
**'''Open Time Series''' [[File:Open Macro.svg|14px]] – Only available if a time series has previously been defined, and the time series is specifically called in the ''Head'' column. For example, if a time series named "ts_1" is defined, enter "ts_1" in the Head column of the appropriate row. Click to bring up the | |||
**'''Filter on Selected Cells''' [[File:Mf6filter.svg|14px]] – Click to turn on filtering on the selected cells. | |||
Table – Contains different information depending on the package chosen in the ''Packages:'' section. Options are as follows: | |||
{| Class="wikitable" | |||
! Package | |||
! Table | |||
|- | |||
| CHD || ''LAY'' – Used to specify certain layers of the module. | |||
''ROW'' – Used to specify certain rows. | |||
''COL'' – Used to specify certain columns. | |||
''HEAD'' – Represents the head at the boundary. | |||
|- | |||
| DRN || ''LAY'' – Used to specify which layer is being applied. | |||
''ROW'' – Used to specify which row is being applied. | |||
''COL'' – Used to specify which column is being applied. | |||
''ELEV'' – Represents the elevation of the drain. | |||
''COND'' – Represents the hydraulic conductance between the aquifer and the drain. | |||
|- | |||
| GHB || ''LAY'' – Used to specify certain layers of the module. | |||
''ROW'' – Used to specify which row is being applied. | |||
''COL'' – Used to specify which column is being applied. | |||
''BHEAD'' – Represents the boundary head. | |||
''COND'' – Represents the hydraulic conductance between the aquifer cell and the boundary. | |||
|- | |||
| HFB || ''LAY1'' – Represents the first of two chosen layers. | |||
''ROW1'' – Represents the first of two chosen rows. | |||
''COL1'' – Represents the first of two chosen columns. | |||
''LAY2'' – Represents the second of two chosen layers. | |||
''ROW2'' – Represents the second of two chosen rows. | |||
''COL2'' – Represents the second of two chosen columns. | |||
''HYDCHR'' – The hydraulic characteristic of the horizontal-flow barrier. When this variable is negative it multiplied by the conductance of two cells. | |||
|- | |||
| LAK || ''LAKENO_OUTLETNO'' – A value that defines the reach number associated with the specified PERIOD data. | |||
''SETTING'' – Information that is linked to keywords and values. | |||
''VALUE1'' – Value to be entered in relation to the specific project. | |||
''VALUE2'' – Value to be entered in relation to the specific project. | |||
|- | |||
| MAW || ''WELLNO'' – A value that defines the reach number associated with the specified PERIOD data. | |||
''MAWSETTING'' – Information that is linked to keywords and values. | |||
''VALUE1'' – Value to be entered in relation to the specific project. | |||
''VALUE2'' – Value to be entered in relation to the specific project. | |||
''VALUE3'' – Value to be entered in relation to the specific project. | |||
|- | |||
| RIV || ''LAY'' – Used to specify which row is being applied. | |||
''ROW'' – Used to specify which row is being applied. | |||
''COL'' – Used to specify which column is being applied. | |||
''STAGE'' – Variable that represents the head in the river. | |||
''COND'' – Variable that represents the riverbed hydraulic conductance. | |||
''RBOT'' – Variable that represents the elevation of the bottom of the riverbed. | |||
|- | |||
| SFR || ''RNO'' – A value that defines the reach number associated with the specified PERIOD data. | |||
''SFRSETTING'' – Information that is linked to keywords and values. | |||
''VALUE1'' – Value to be entered in relation to the specific project. | |||
''VALUE2'' – Value to be entered in relation to the specific project. | |||
|- | |||
| UZF || ''IUZNO'' – An integer value that defines the UZF cell number associated with the specified PERIOD data on the line. | |||
''FINF'' – A value that defines the applied infiltration rate of the UZF cell. | |||
''PET'' – A value that defines the ET rate of the UZF cell and specified GWF cell. | |||
''EXDP'' – A value that defines the ET extinction depth of the UZF cell. | |||
''EXTWC'' – A value that defines the amount of water removed from the UZF cell through evapotranspiration. | |||
''HA'' – A value that defines the amount of potential air that enters the UZF cell. | |||
''HROOT'' – A value that defines the root potential of the UZF cell. | |||
''ROOTACT'' – A value that defines how much root activity exists in the UZF cell. | |||
|- | |||
| WEL || ''LAY'' – Represents which layer within the grid to which the chosen well will be assigned. | |||
''ROW'' – Represents which row within the grid to which the chosen well will be assigned. | |||
''COL'' – Represents which column within the grid to which the chosen well will be assigned. | |||
''Q'' – Represents the volumetric well rate at which the recharge (positive value) and discharge (negative value) of the well will be. | |||
|} | |||
{{-}} | {{-}} | ||
| Line 552: | Line 996: | ||
{{-}} | {{-}} | ||
{{Auxiliary Variables Dialog}} | |||
{{ | {{MF6 Time Series Files Dialog}} | ||
{{MF6 Observation Files Dialog}} | |||
{{ | {{MF6 Time-Array Series Files Dialog}} | ||
{{MF6 Add Stresses Dialog}} | |||
{{ | |||
==External Link== | ==External Link== | ||
* [https://water.usgs.gov/ogw/modflow/MODFLOW.html#over MODFLOW 6 website with USGS] | * [https://water.usgs.gov/ogw/modflow/MODFLOW.html#over MODFLOW 6 website with USGS] | ||
* [https://water.usgs.gov/water-resources/software/MODFLOW-6/mf6io_6.1.0.pdf MODFLOW 6 Description of Input and Output] | |||
| Line 585: | Line 1,015: | ||
[[Category:MODFLOW]] | [[Category:MODFLOW]] | ||
[[Category:External Links]] | [[Category:External Links]] | ||
[[Category:Archived]] | |||
